-

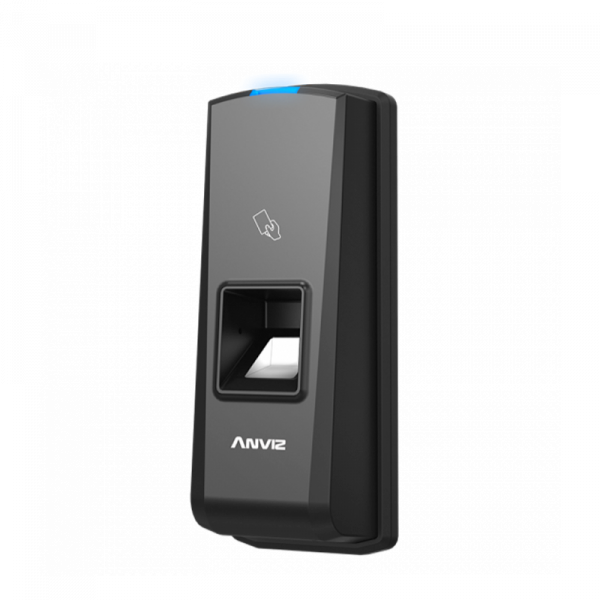
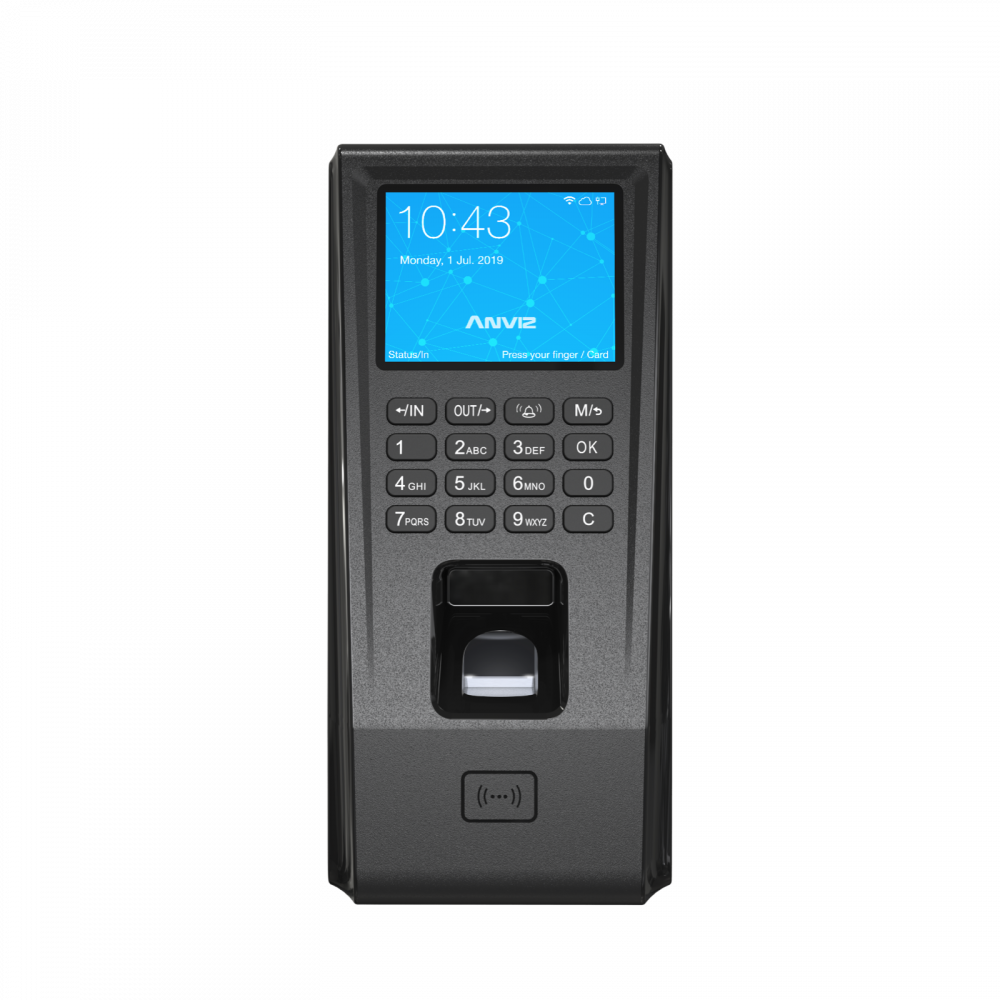
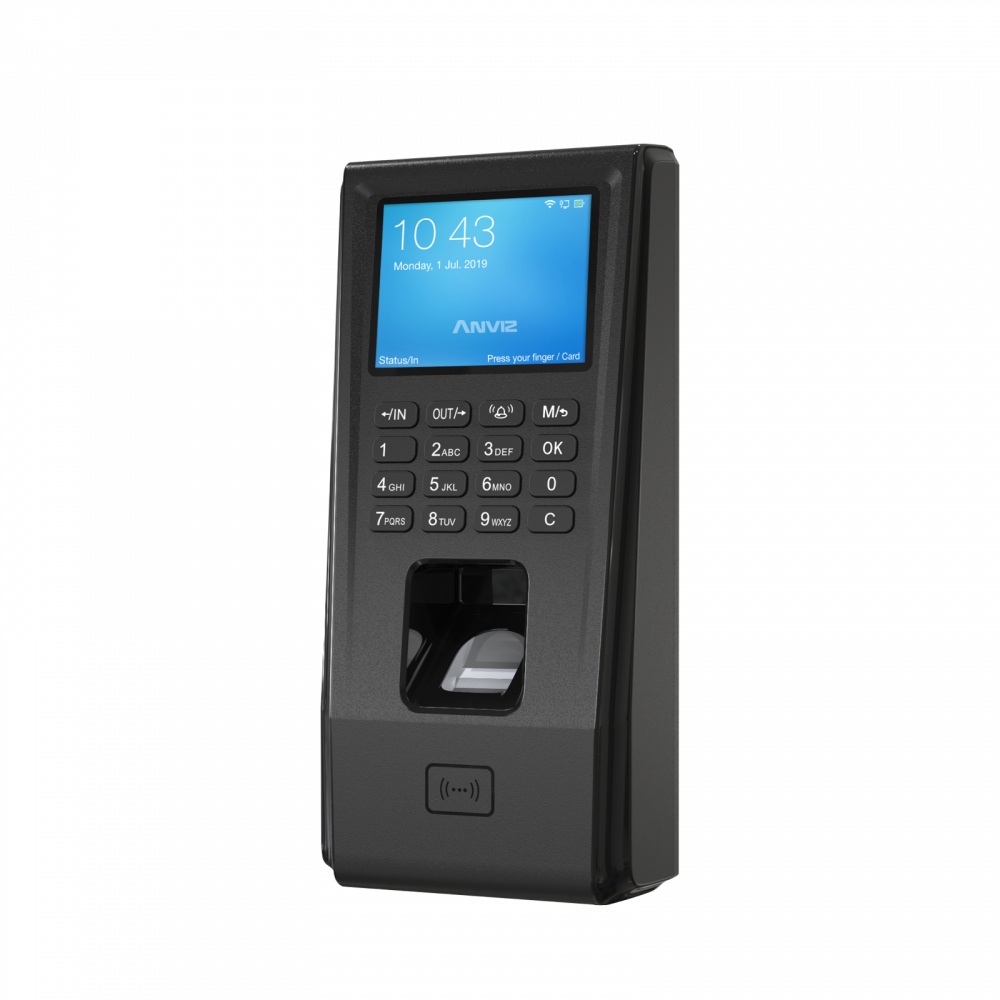
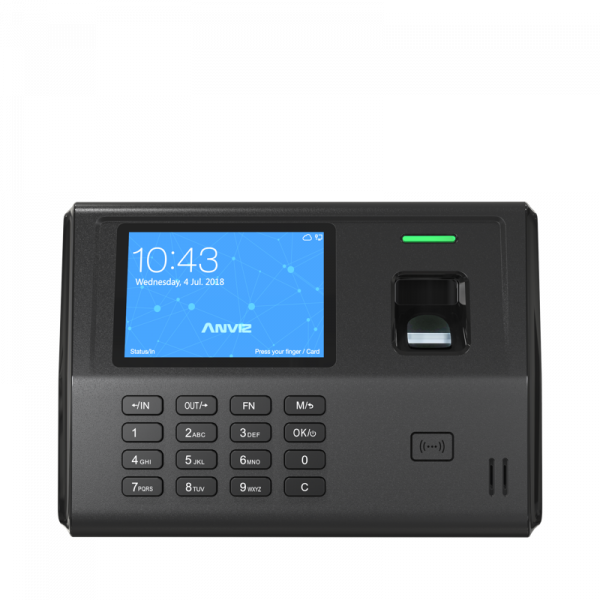
EP30
IP Fingerprint and RFID Access Control Terminal
EP30 is a new-generation IP-based access control terminal. With a fast, Linux-based 1.0Ghz CPU and the latest BioNANO® fingerprint algorithm, EP30 ensures a less than 0.5 second comparison time under 1:3000 status. Standard WiFi functions realize the flexible installation and operation. The Web-server function realizes easily self-management of the device.


-
Features
-
High Speed CPU, <0.5 second comparison time
-
Internal WebServer Management
-
Support Cloud Solution.
-
Standard TCP/IP & WIFI Function
-
Powerful Standalone Access Control Function
-
Colorful 2.4 TFT-LCD screen
-
-
Specification
Capacity Fingerprint Capacity 3,000
Card Capacity 3,000
Log Capacity 50,000
Inferface Comm TCP/IP, Wi-Fi
Access I/O
Wiegand Ouput, Relay out, Exit button, Door bell
Feature Identification mode
Fingerprint, Password, Card (125Khz EM)
Card reading distance
2~5cm (125KHz),
Identification speed
<0.5s
RFID Card
125Khz EM
Working Temperature
-10°C~70°C
Humidity
10% to 90%
Power
DC12V
WebServer
Support
-
Application
Related Download
- Brochure 13.2 MB
-
2022_Access Control & Time and Attendance Solutions_En(Single page)
02/18/2022
13.2 MB


- Brochure 13.0 MB
-
2022_Access Control & Time and Attendance Solutions_En(Spread format)
02/18/2022
13.0 MB
- Brochure 1.5 MB
-
EP30 Flyer
03/31/2021
1.5 MB
- Manual 7.5 MB
-
EP30 Quick Guide
09/10/2020
7.5 MB
Related Faq
-
Contents:
Part 1. Firmware Updates Via Web Server
1) Normal Update (video)
2) Forced Update (video)
Part 2. Firmware Updates Via CrossChex (video)
Part 3. Firmware Updates Via Flash Drive
1) Normal Update (video)
2) Forced Update (video)
.
Part 1. Firmware Update Via Web Server
1) Normal Update
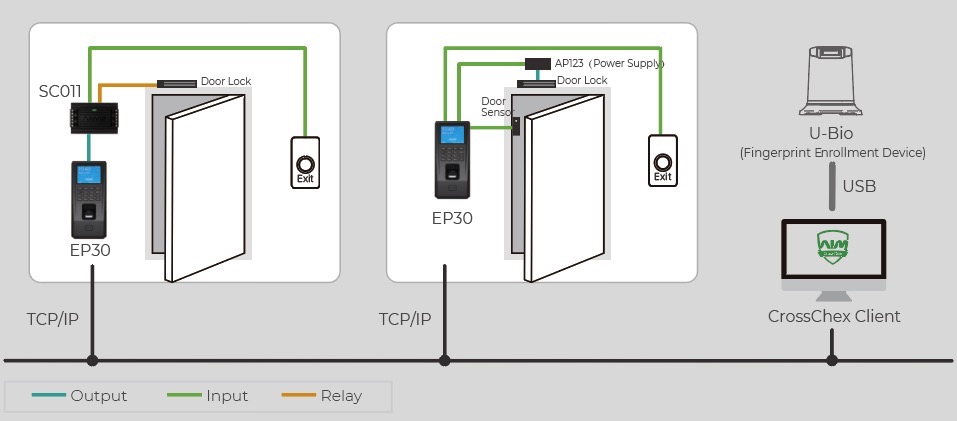
>> Step 1: Connect Anviz device to PC via TCP/ IP or Wi-Fi. (How to connect to CrossChex)
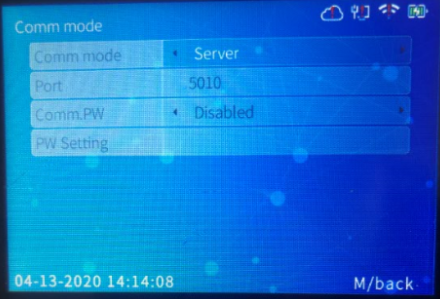
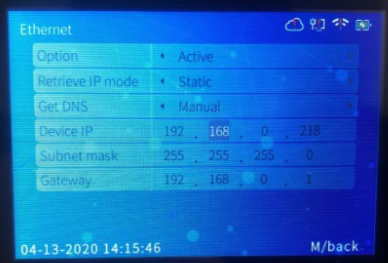
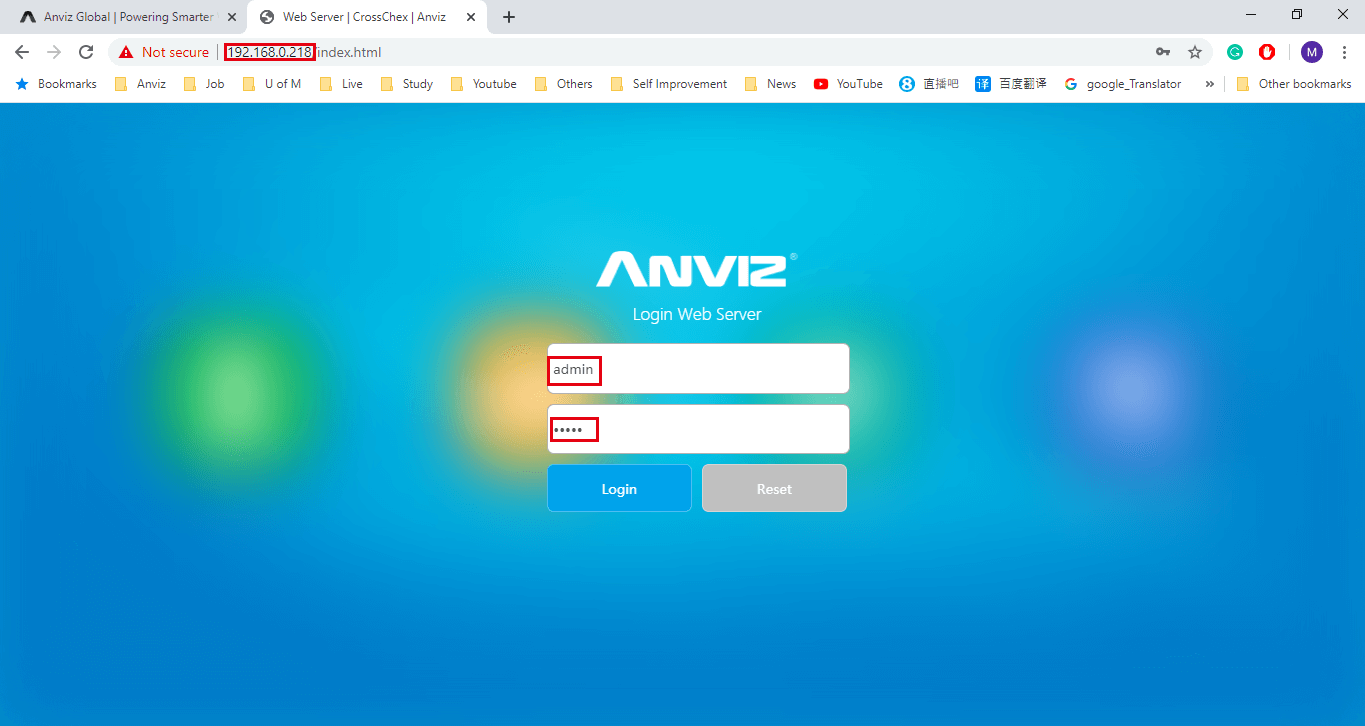
>> Step 2: Run a browser (Google Chrome is recommended). In this example, the device is set in the server mode and IP address as 192.168.0.218.
>> Step 3. Enter 192.168.0.218 (Your device might be different, check the device IP and enter IP address) in the browser address bar to run as the webserver mode.
>> Step 4. Then enter your user account, and password. (default User: admin, Password: 12345)
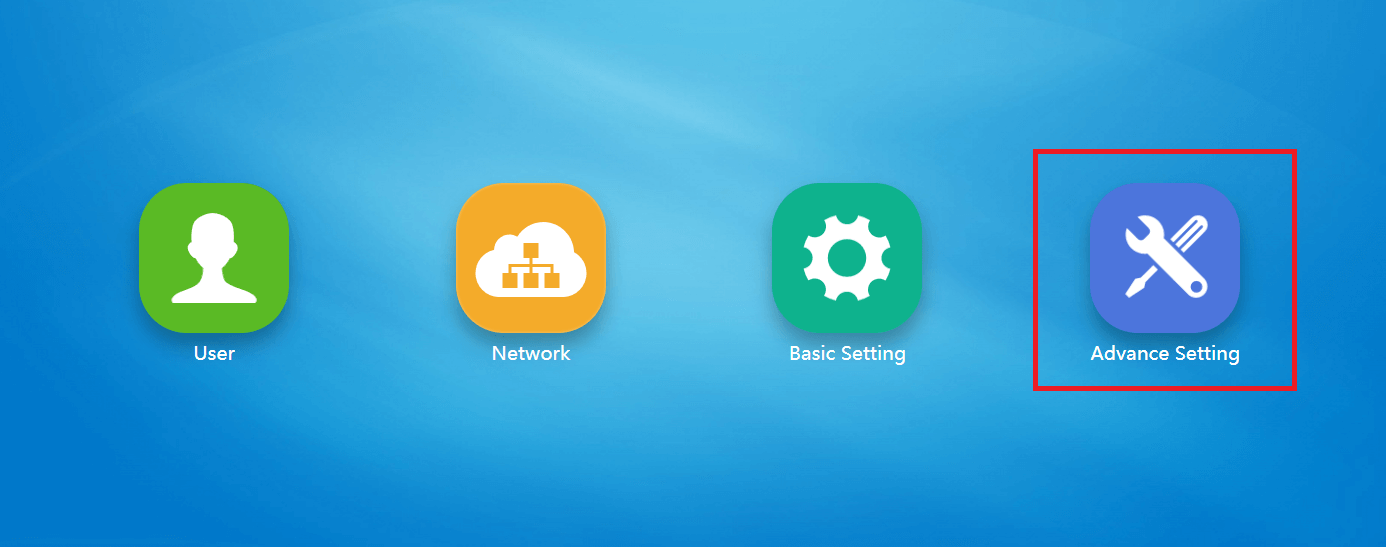
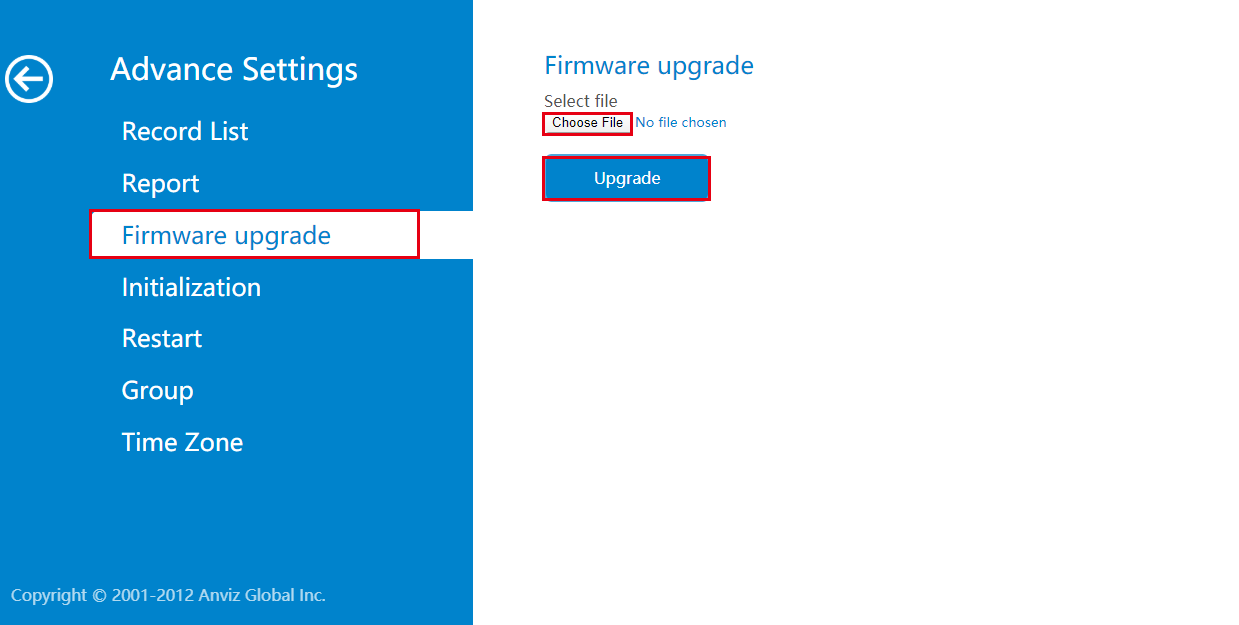
>> Step 5. Choose 'Advance Setting'
>> Step 6: Click 'Firmware Upgrade', choose a firmware file that you want to update and then click 'Upgrade'. Wait for the updating complete.
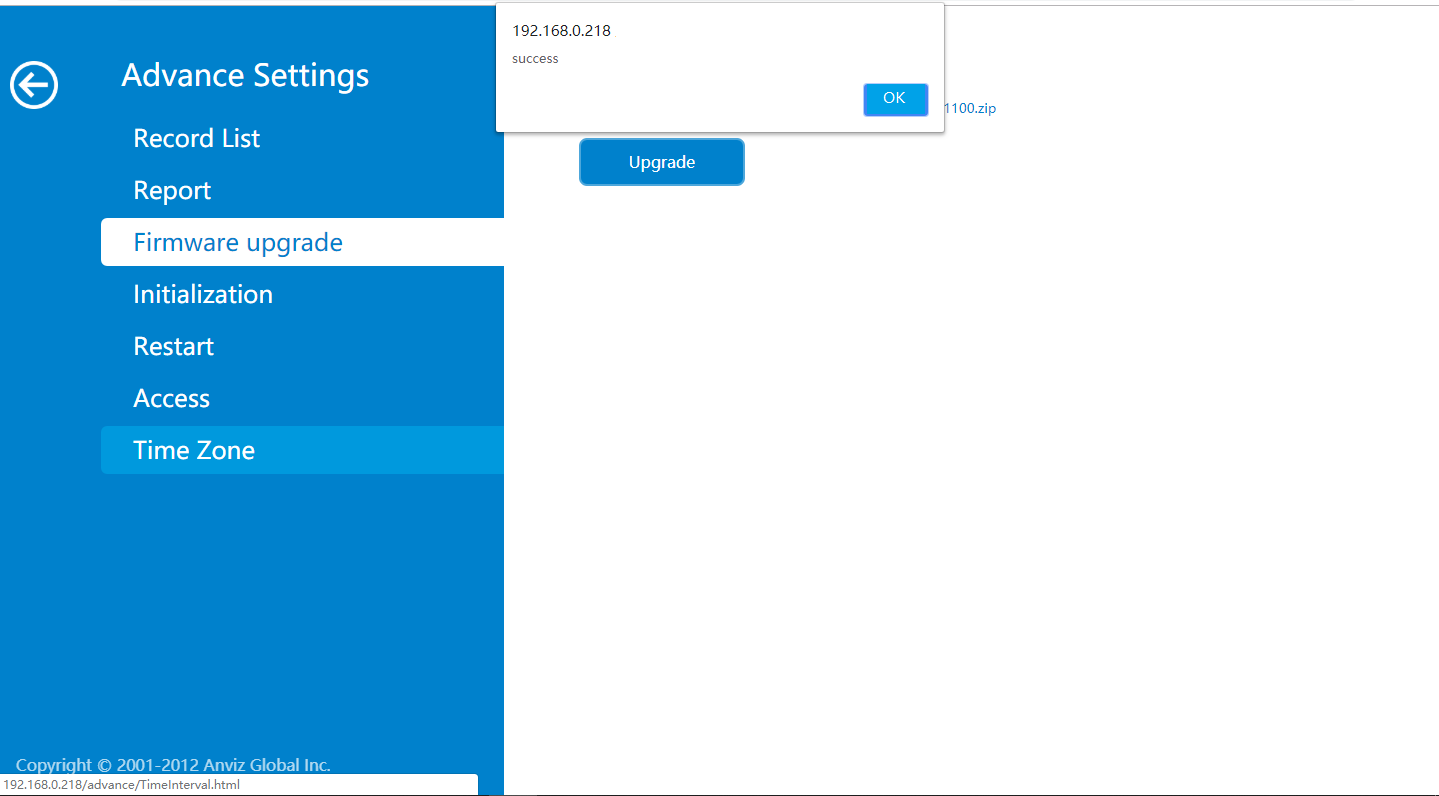
>> Step 7. Update Complete.
>> Step 8. Check the firmware version. (You can check current version either on webserver info page or on the device info page)
2) Forced Update
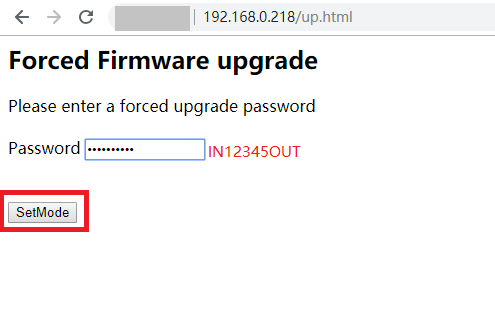
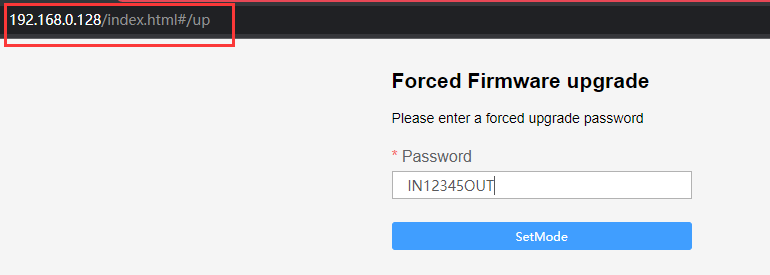
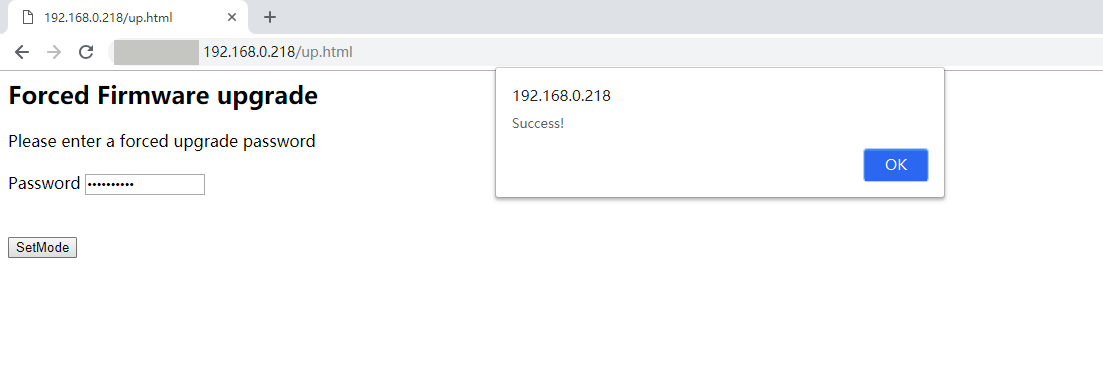
>> Step 1. Follow the steps above till steps 4, and enter 192.168.0.218/up.html or 192.168.0.218/index.html#/up in the browser.
>> Step 2. Forced Firmware Upgrade mode is set successfully.
>> Step 3. Operate Step 5 - Step 6 to finish the forced firmware updates.
Part 2: How To Update Firmware Via CrossChex
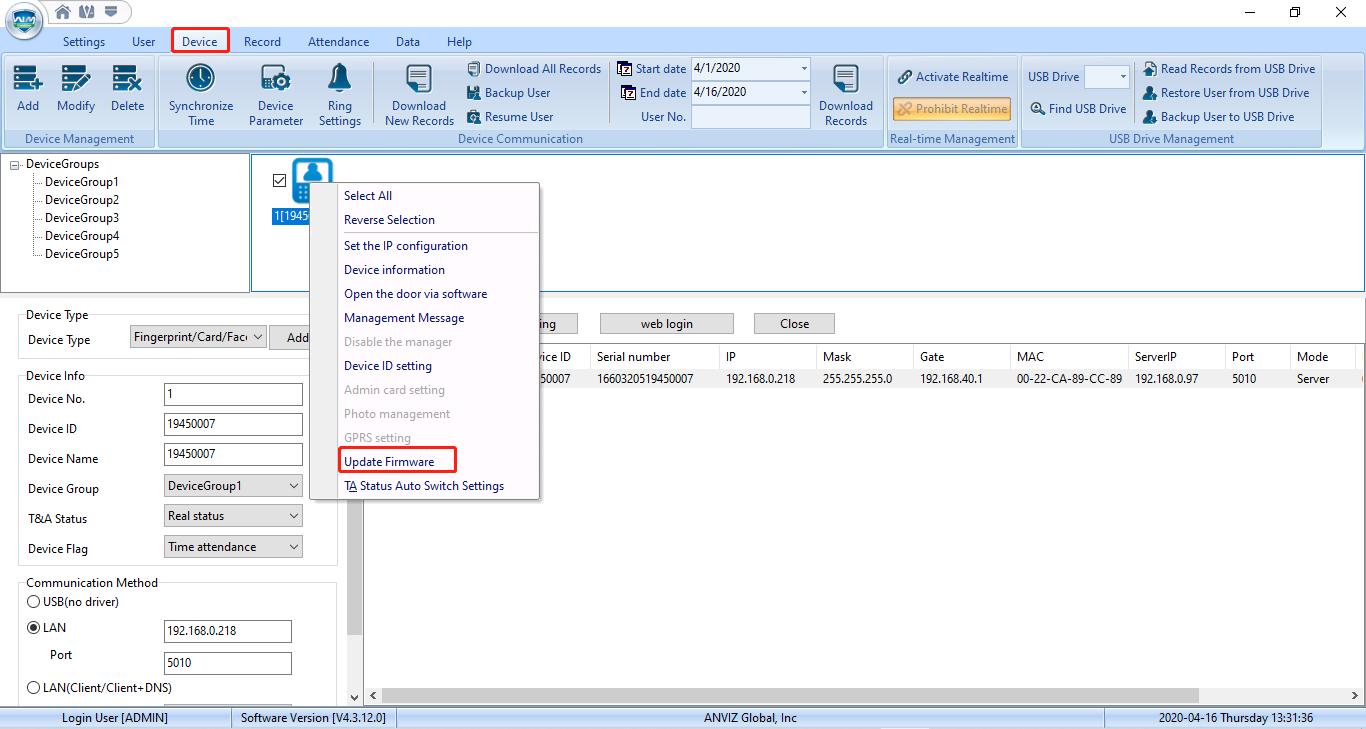
>> Step 1: Connect the Anviz device to the CrossChex.
>> Step 2: Run the CrossChex and click the 'Device' menu on the top. You will be able to see a small blue icon if the device has connected to the CrossChex successfully.
>> Step 3. Right-click the blue icon, and then click the 'Update Firmware'.
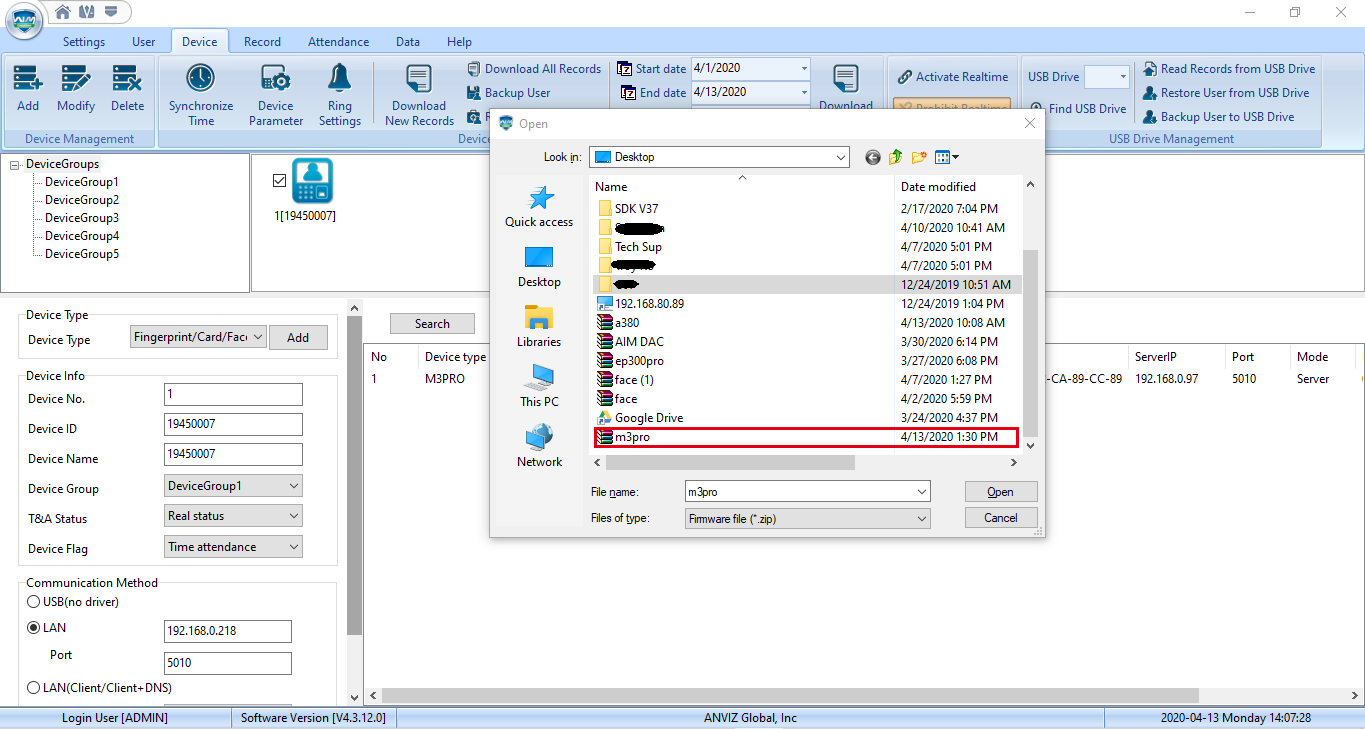
>> Step 4. Choose the firmware that you want to update.
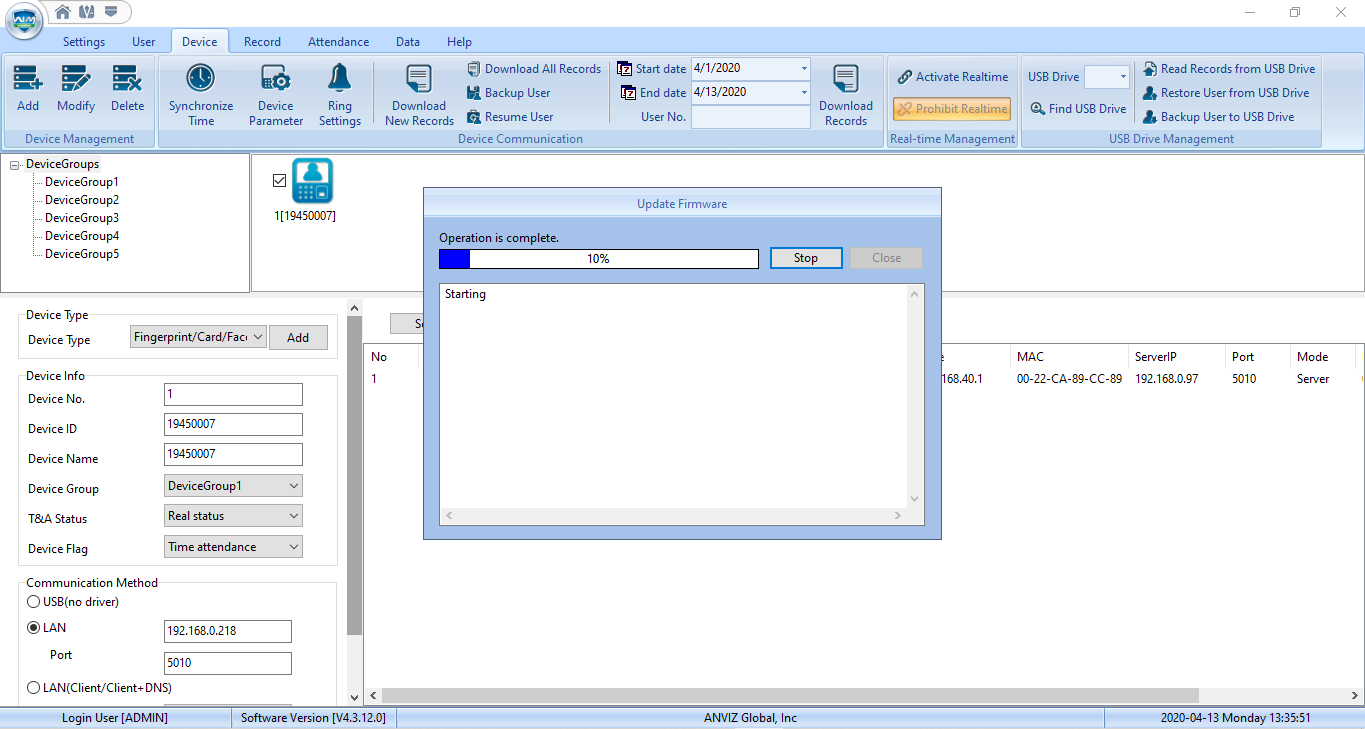
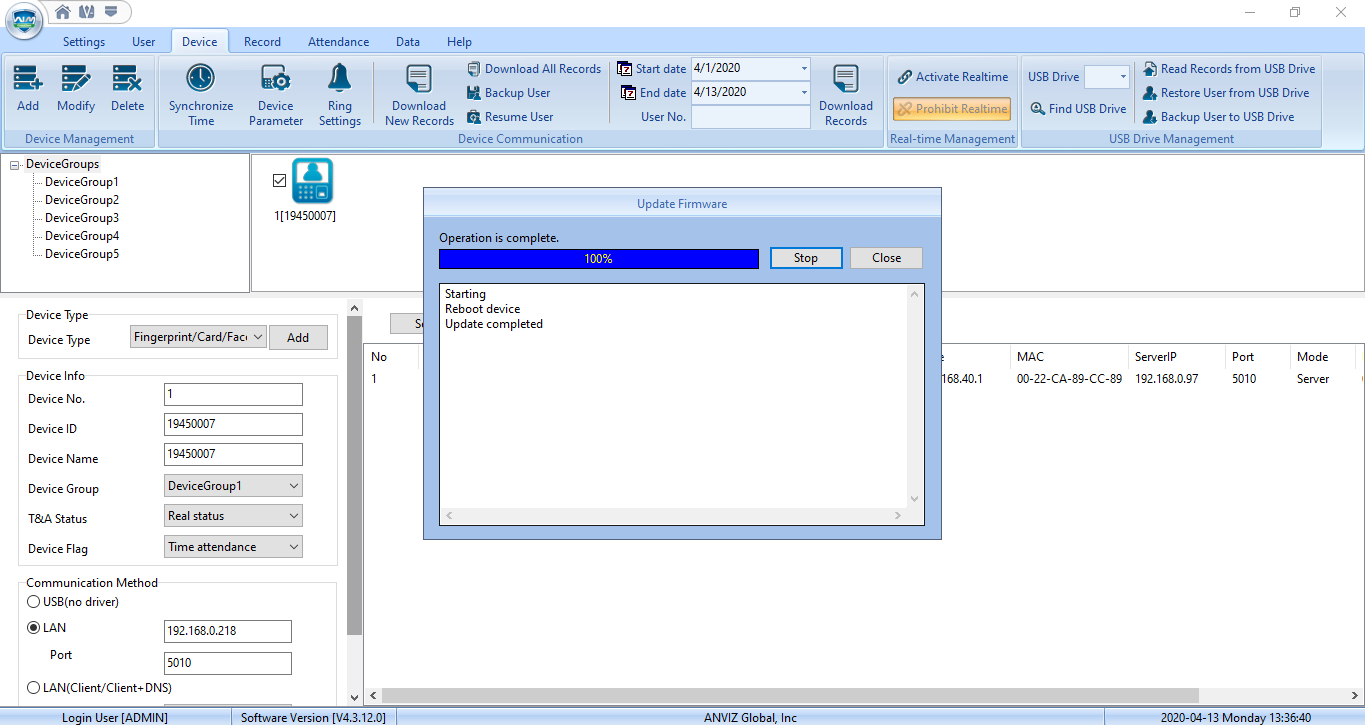
>> Step 5. Firmware update process.
>> Step 6. Firmware Update Complete.
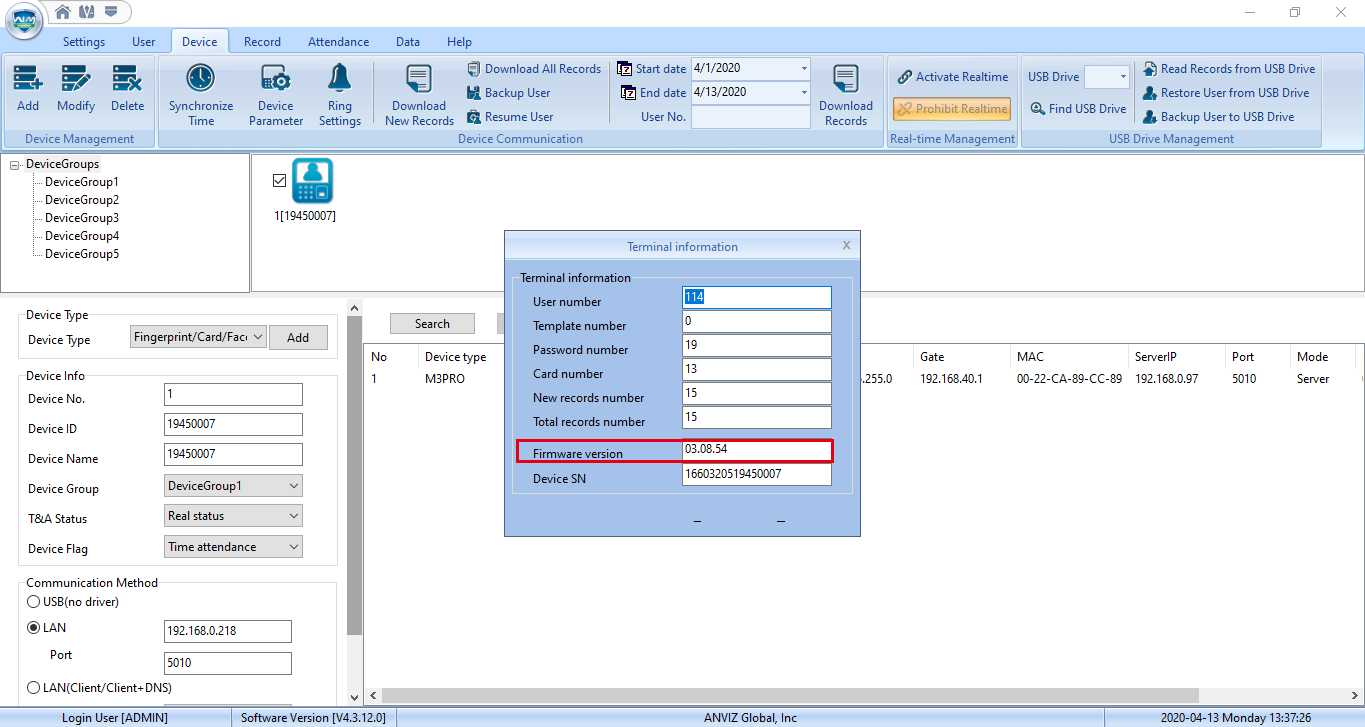
>> Step 7. Click the 'Device' -> Right-Click the blue icon -> 'Device Information' to check the firmware version.
Part 3: How To Update The Anviz Device Via Flash Drive.
1) Normal update mode
Recommended Flash Drive Requirement:
1. Empty Flash Drive, or place firmware files in the Flash Drive root path.
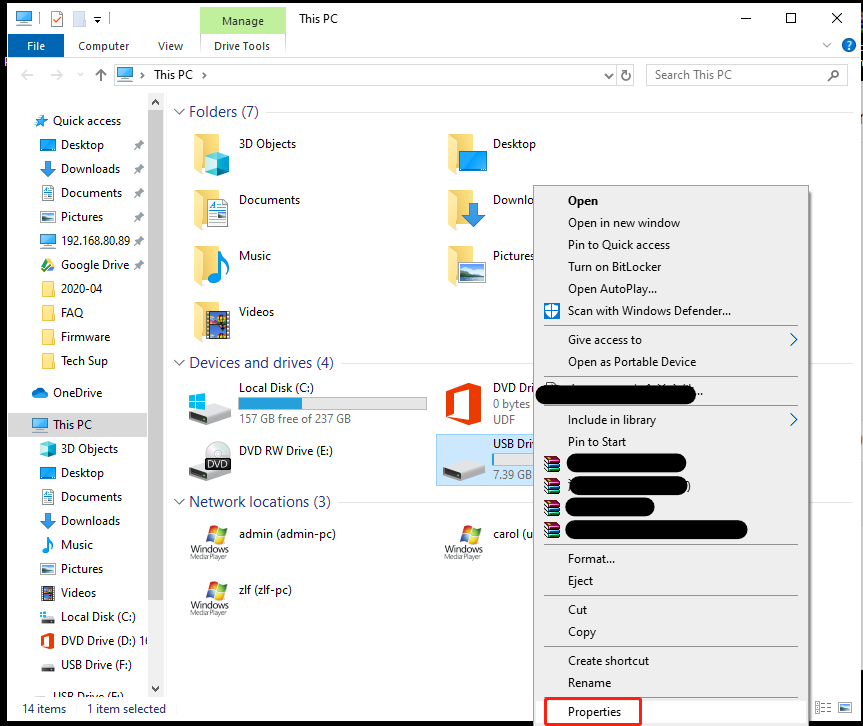
2. FAT file system (Right-click USB Drive and click 'Properties' to check the Flash Drive file system.)
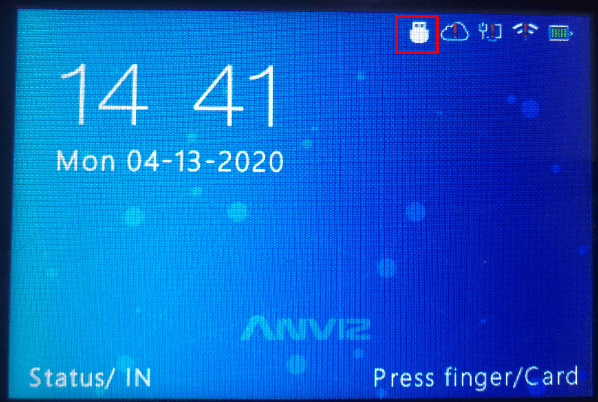
3. Memory Size under 8GB.>> Step 1: Plug a flash drive (with an update firmware file) into the Anviz Device.
You will see a small Flash Drive icon on the device screen.
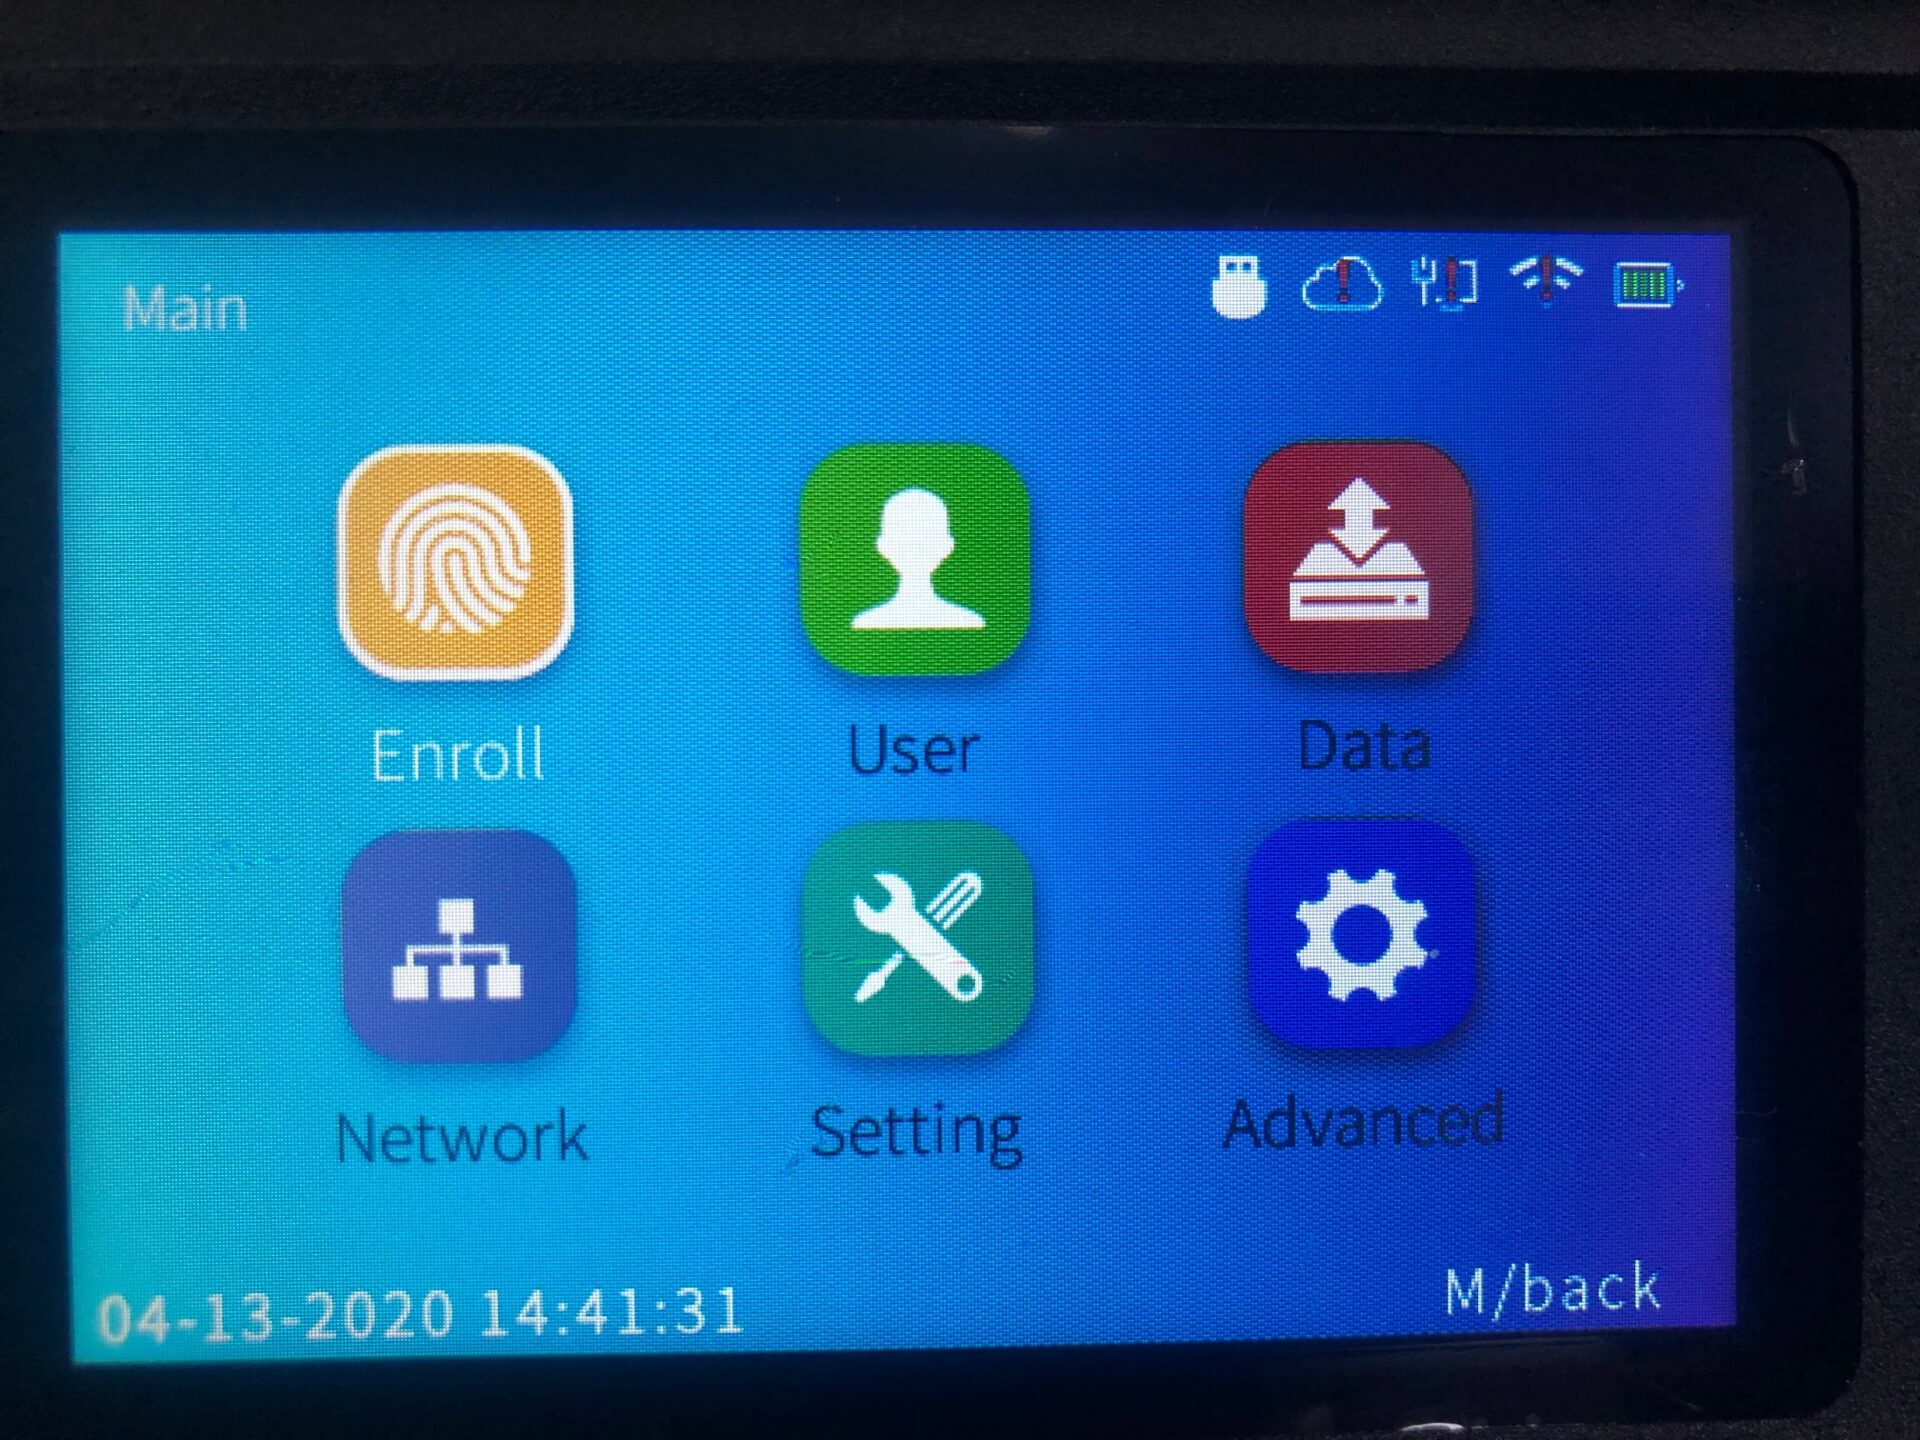
>> Step 2. Login with Admin mode to the device -> and then 'Setting'
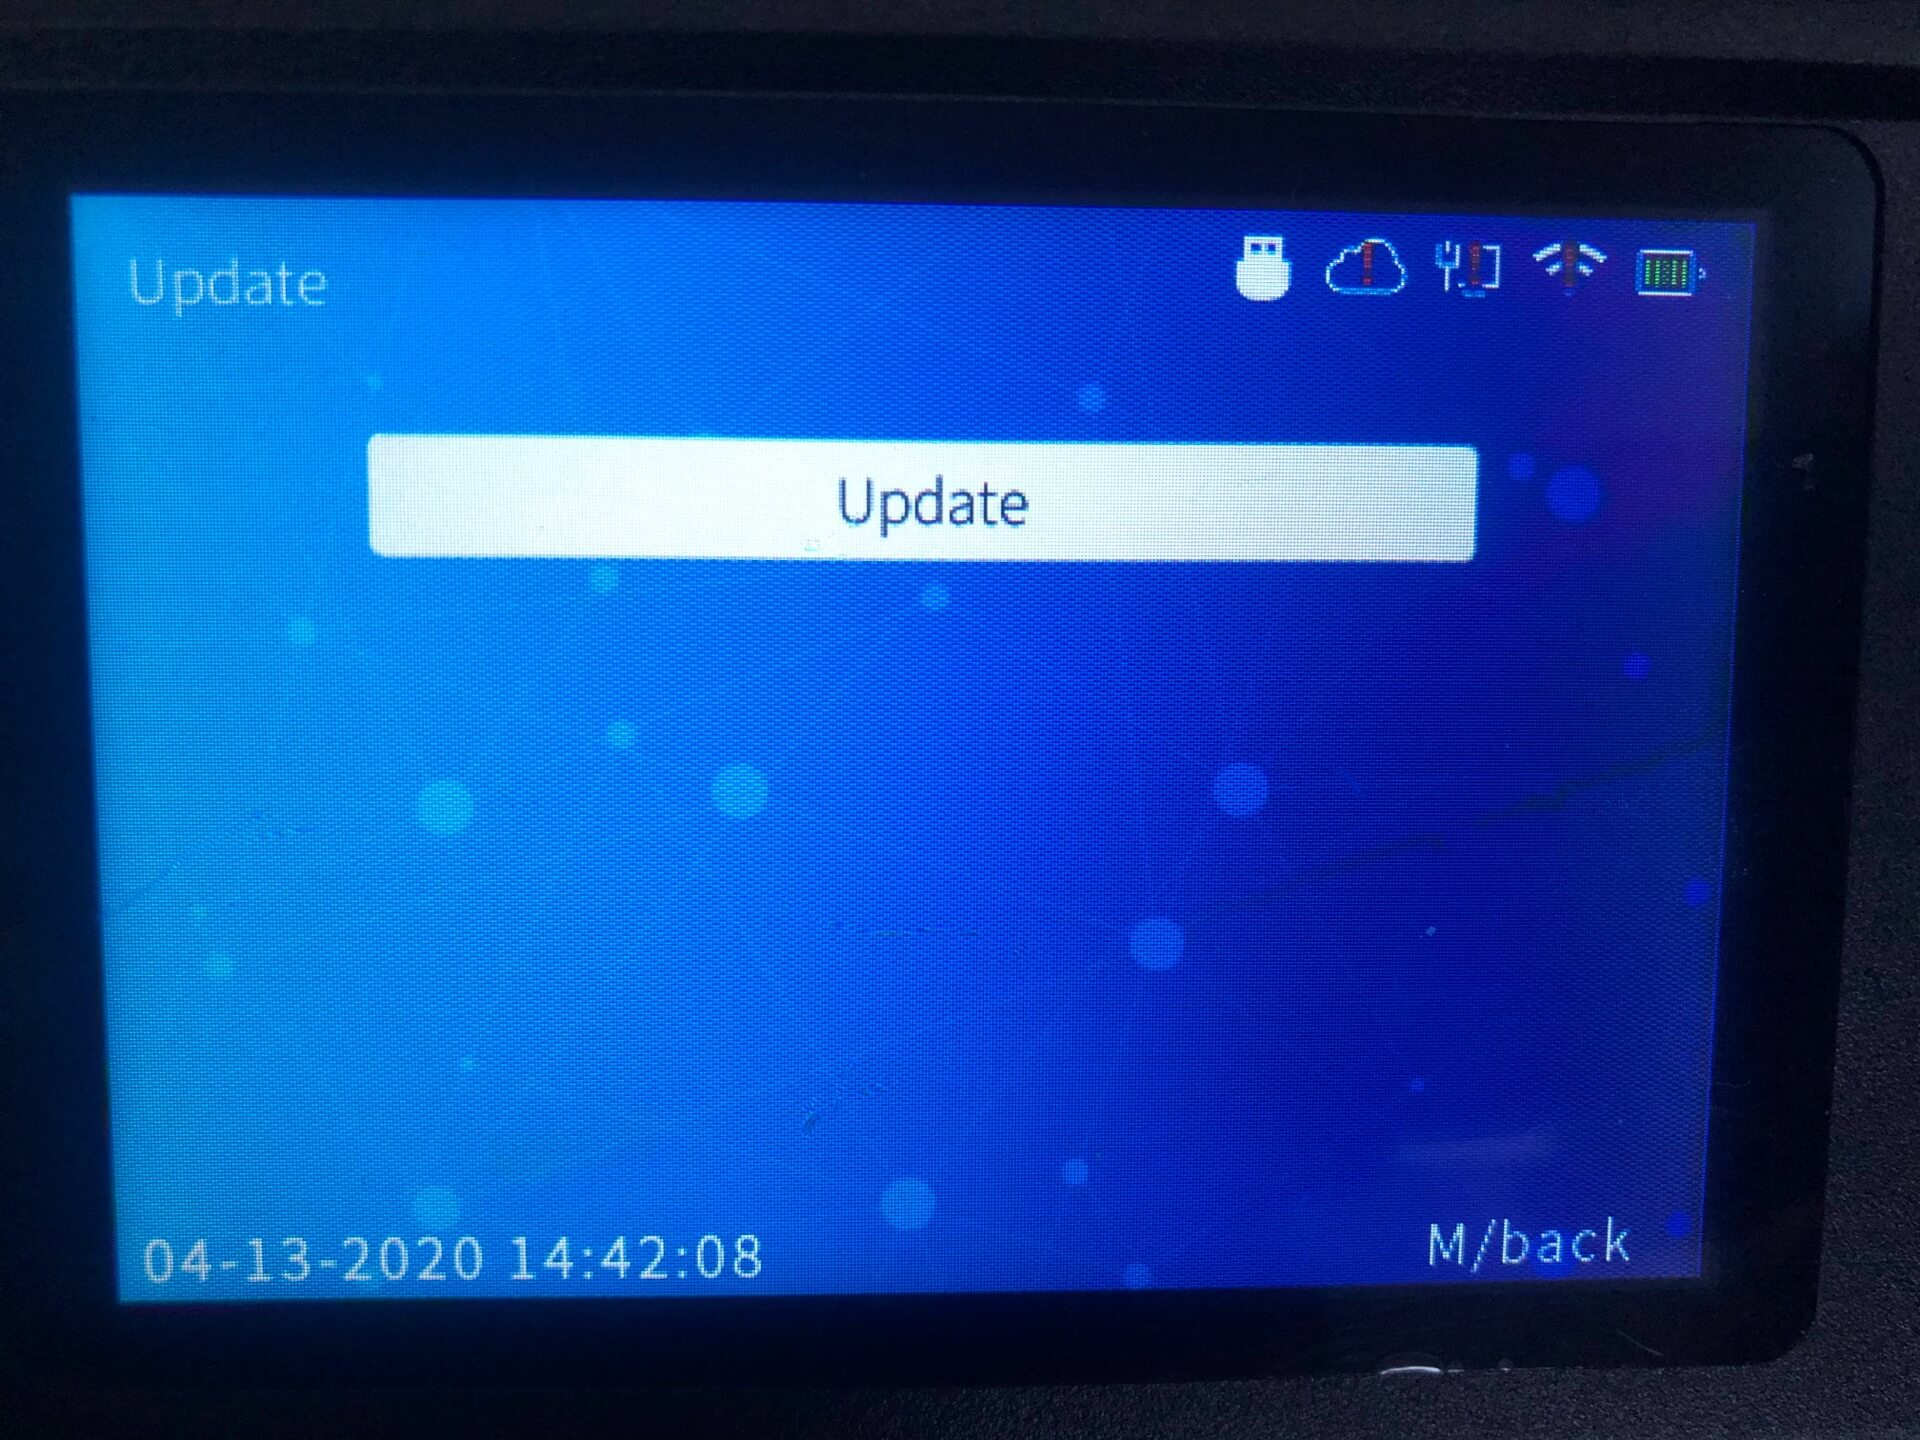
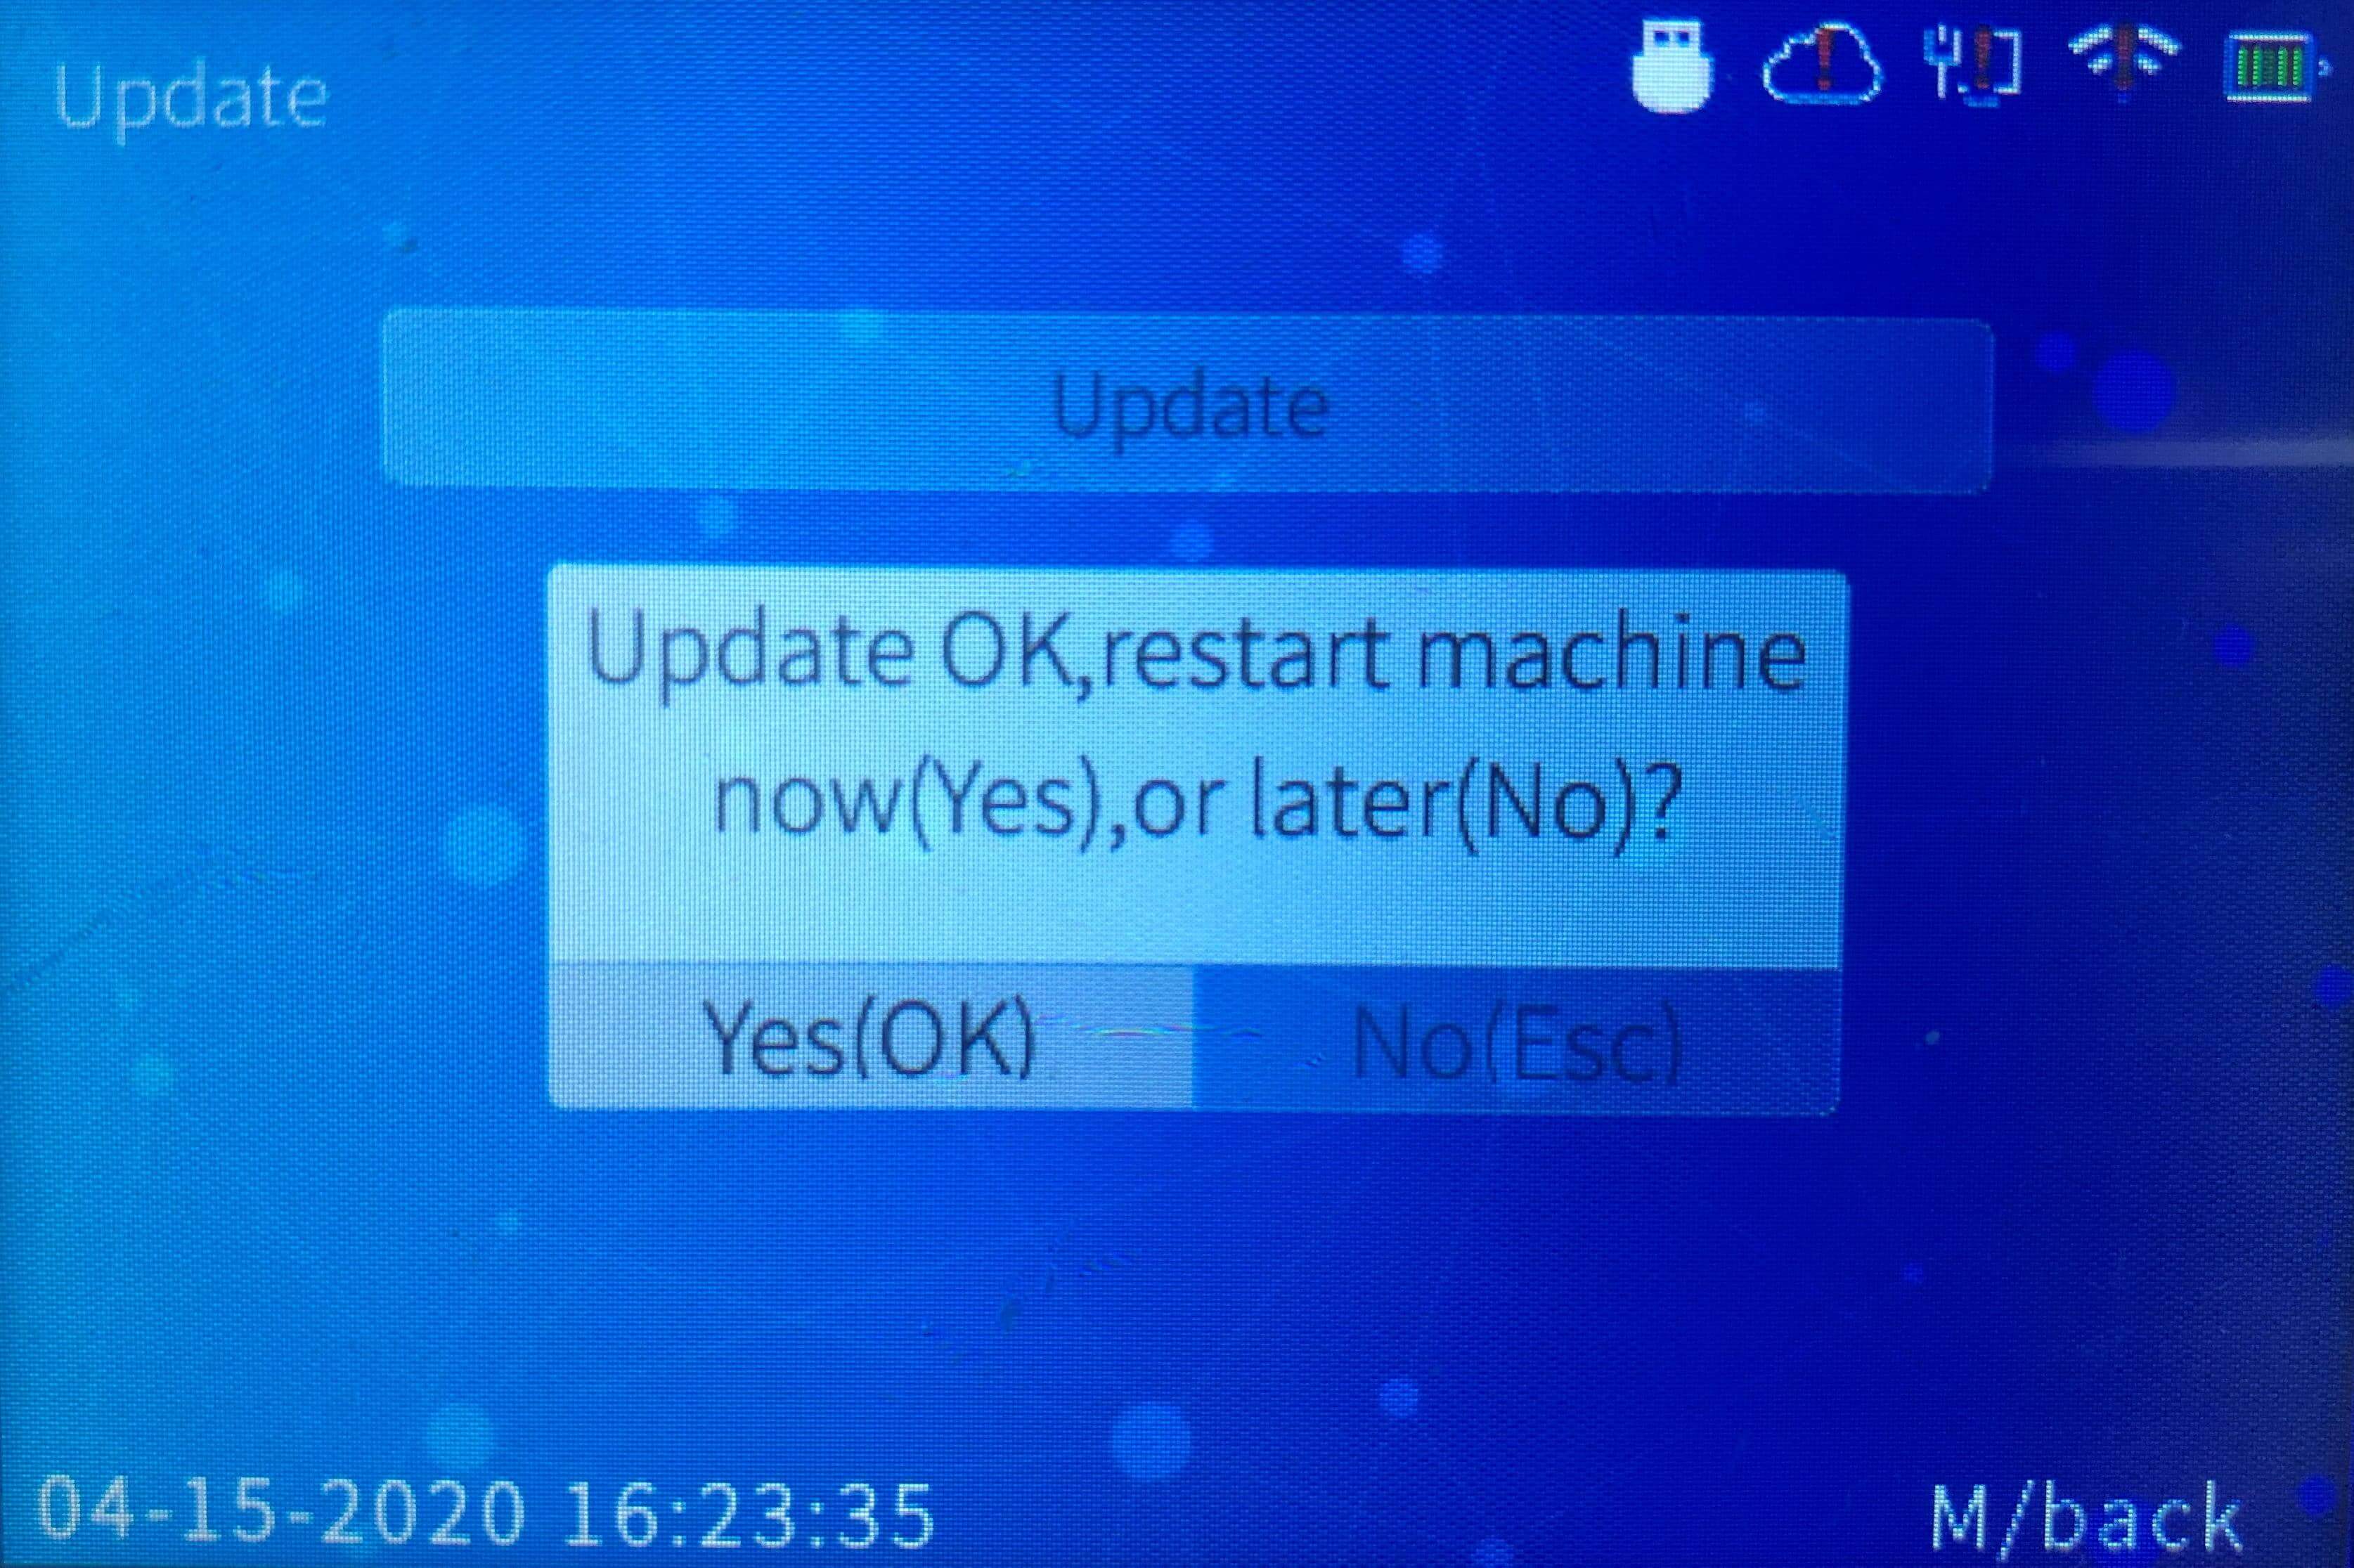
>> Step 3. Click 'Update' -> then 'OK'.
>> Step 4. It will ask you to restart, press 'Yes(OK)' to restart once to complete the update.
>> Done
2) Force update mode
(****** Sometimes devices are not allowed to be updated, this is because of device protection policy. You can use force update mode when this situation occurs. *****)
>> Step 1. Follow the Flash Drive Update from step 1 - 2.
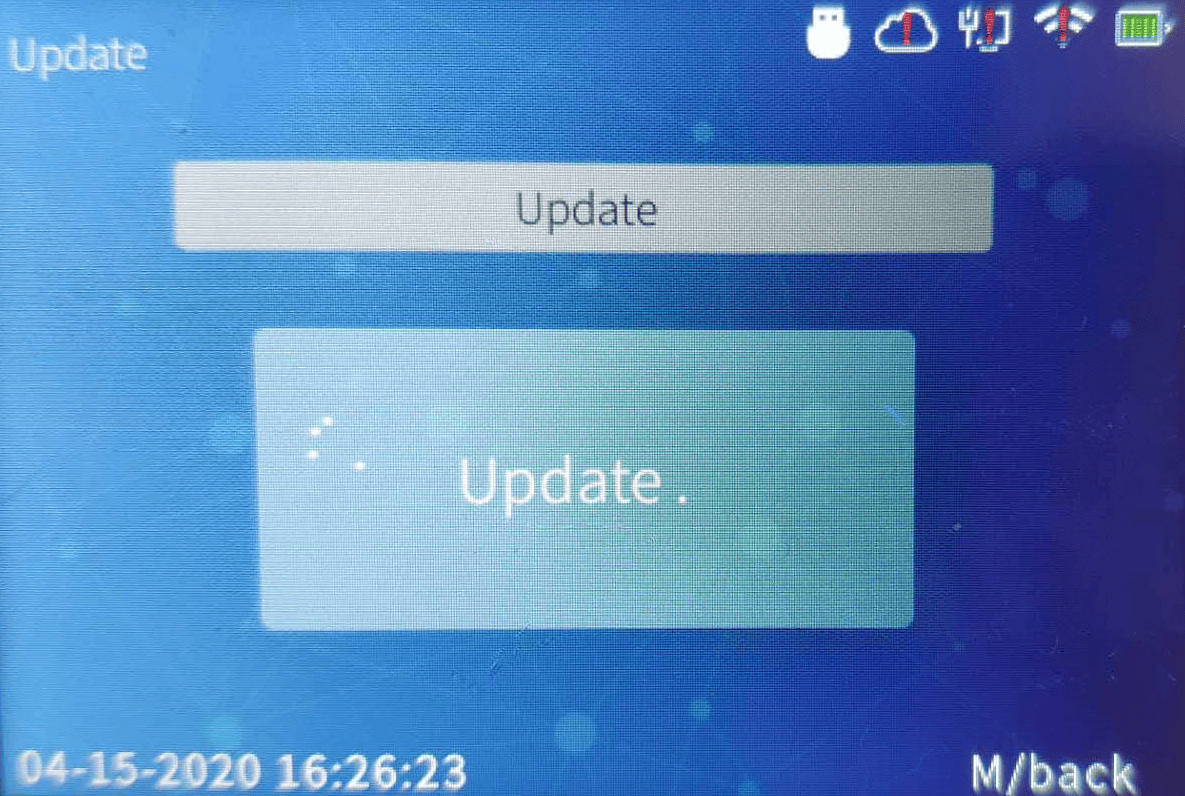
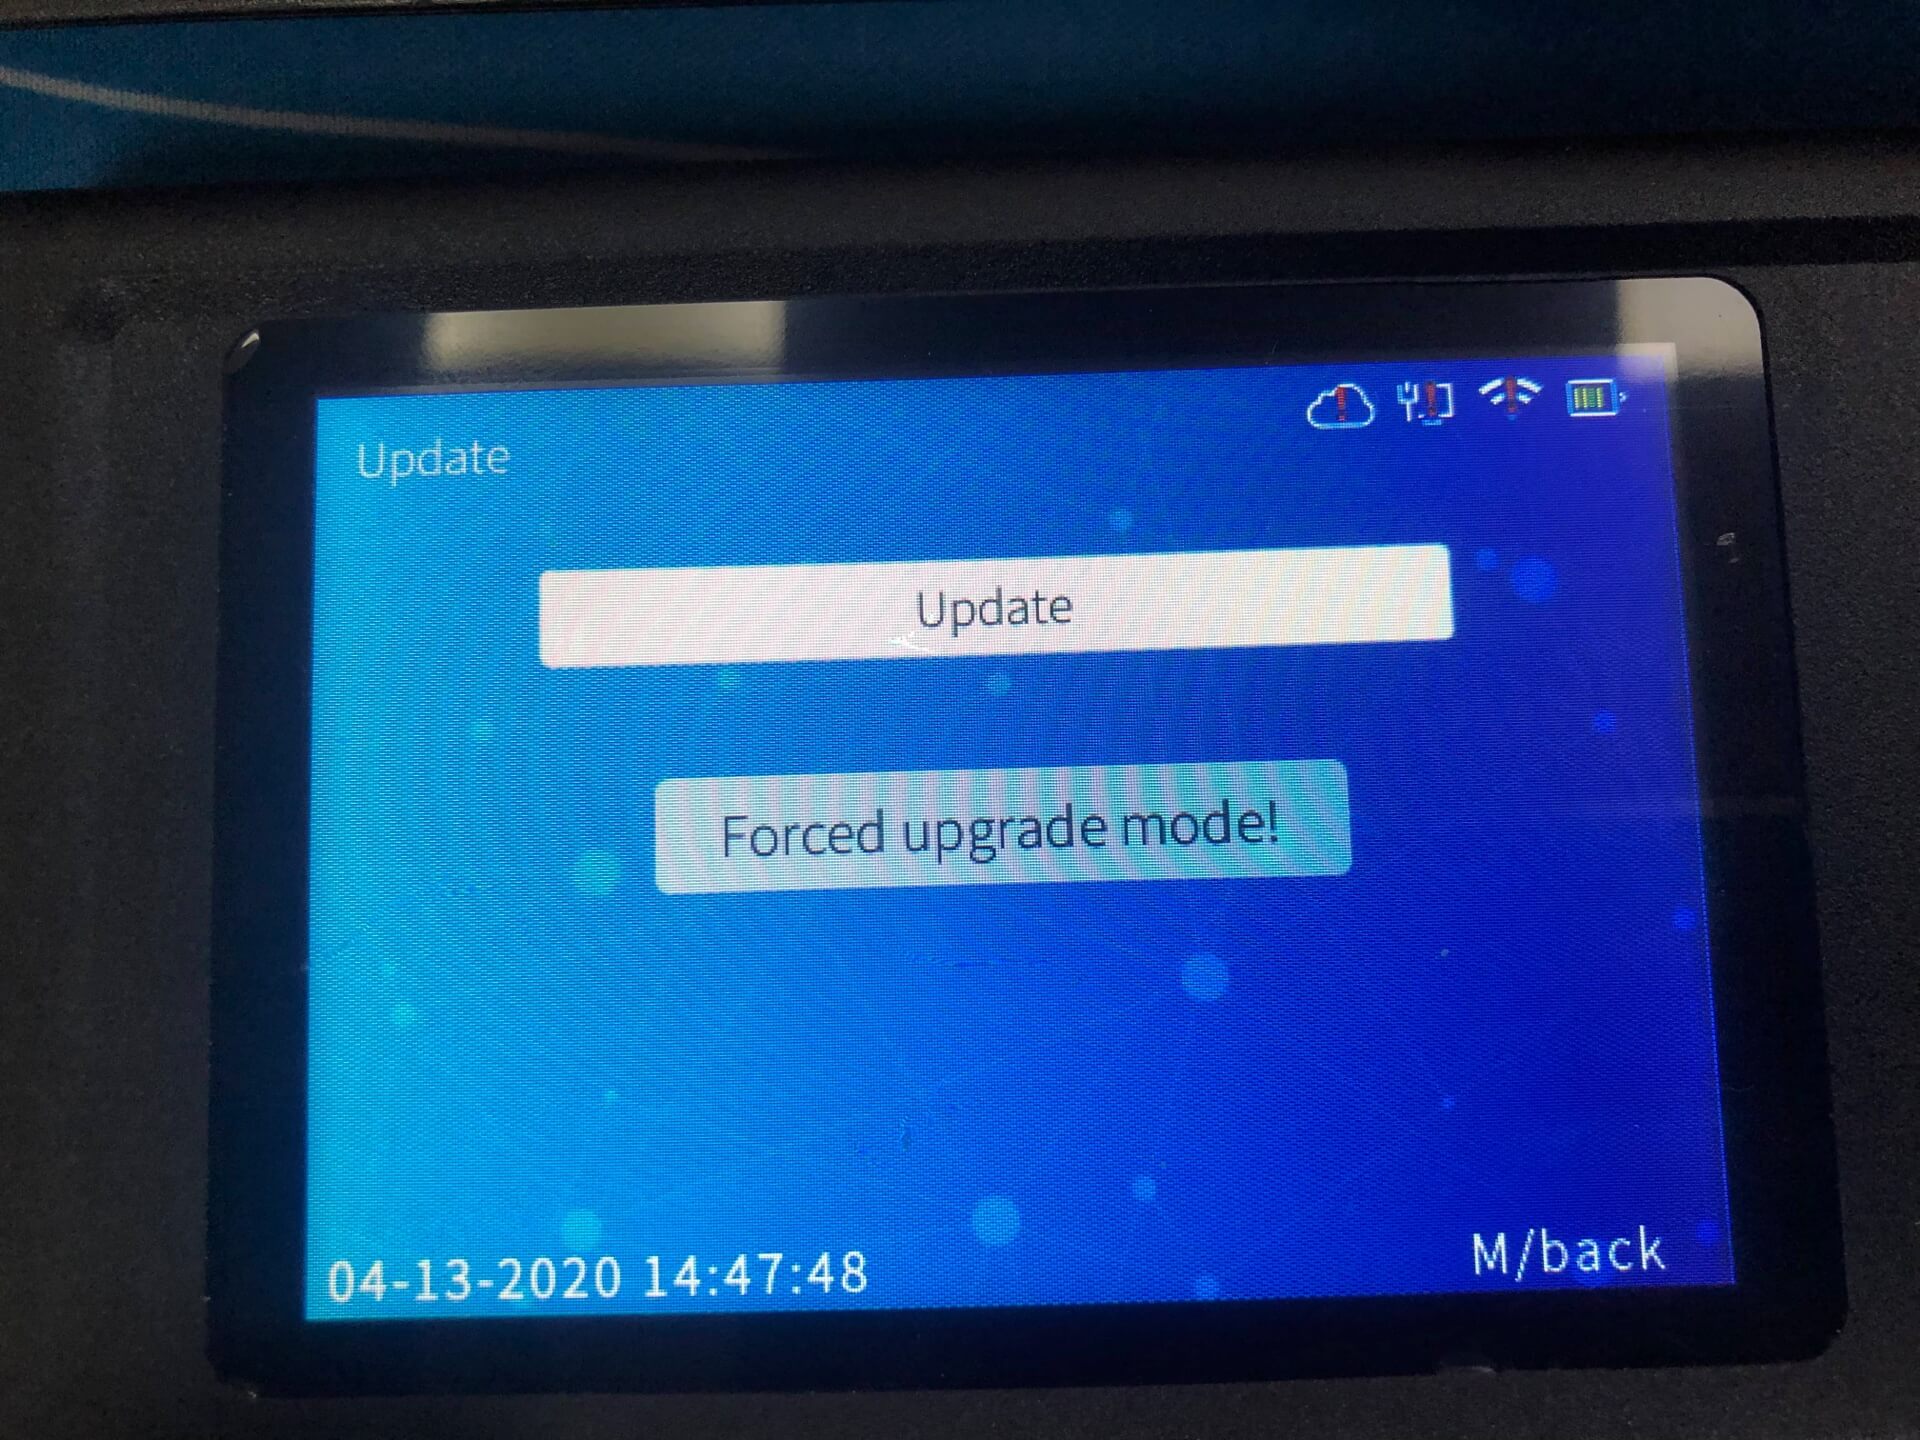
>> Step 2. Click 'Update' to get into the page like showing in the below.
>> Step 3. Press 'IN12345OUT' in the keypad, then the device will change to forced upgrade mode.
>> Step 4. Click 'OK', and the device will restart once to complete the update.
>> Step 5. Update Complete.
-
Contents
Part 1. CrossChex Connection Guide
1) Connection Via the TCP/ IP model
2) Two ways to remove the admin permissionPart 2. Reset Anviz Devices Admin Password
1) Connected to the CrossChex but the admin password is lost
2) The device communication & admin password are lost
3) The keypad is locked, and communication and admin password are lost
Part 1: CrossChex Connection Guide
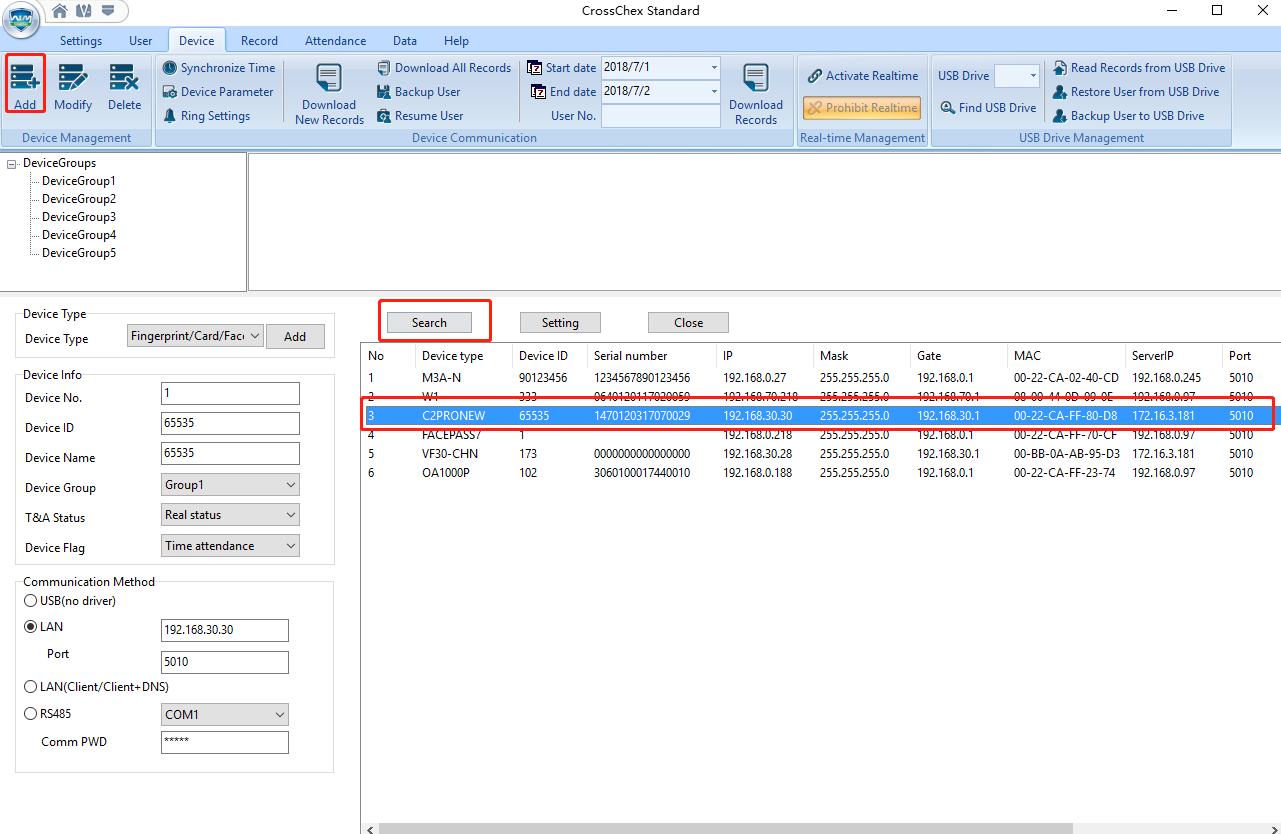
Step 1: Connection via the TCP/IP model. Run the CrossChex, and click the 'Add' button, then the 'Search' button. All available devices will be listed below. Choose the device that you want to connect to the CrossChex and press the 'Add' button.
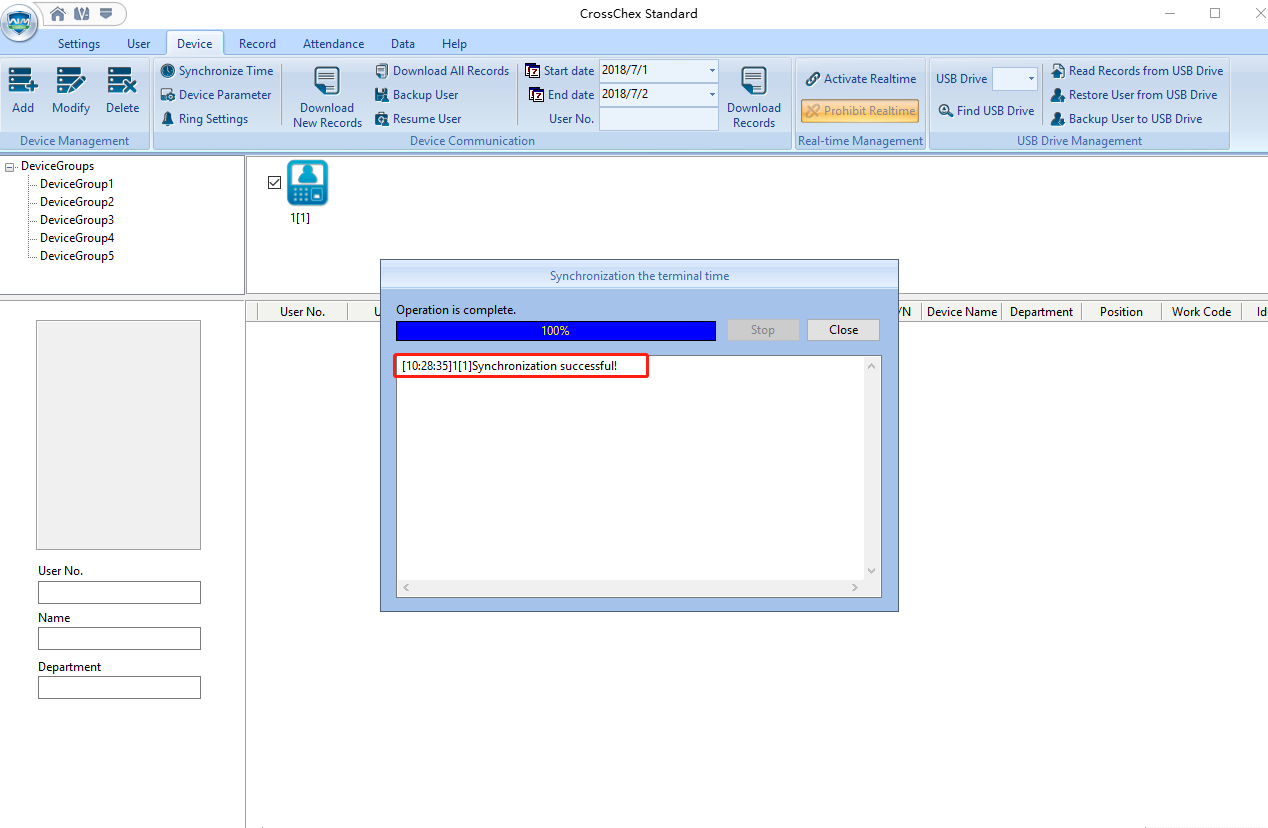
Step 2: Test if the device is connected to the CrossChex.
Click the 'Synchronize time' to test and make sure the device and CrossChex are connected successfully.
2) Two methods to clear the administrator's permission.
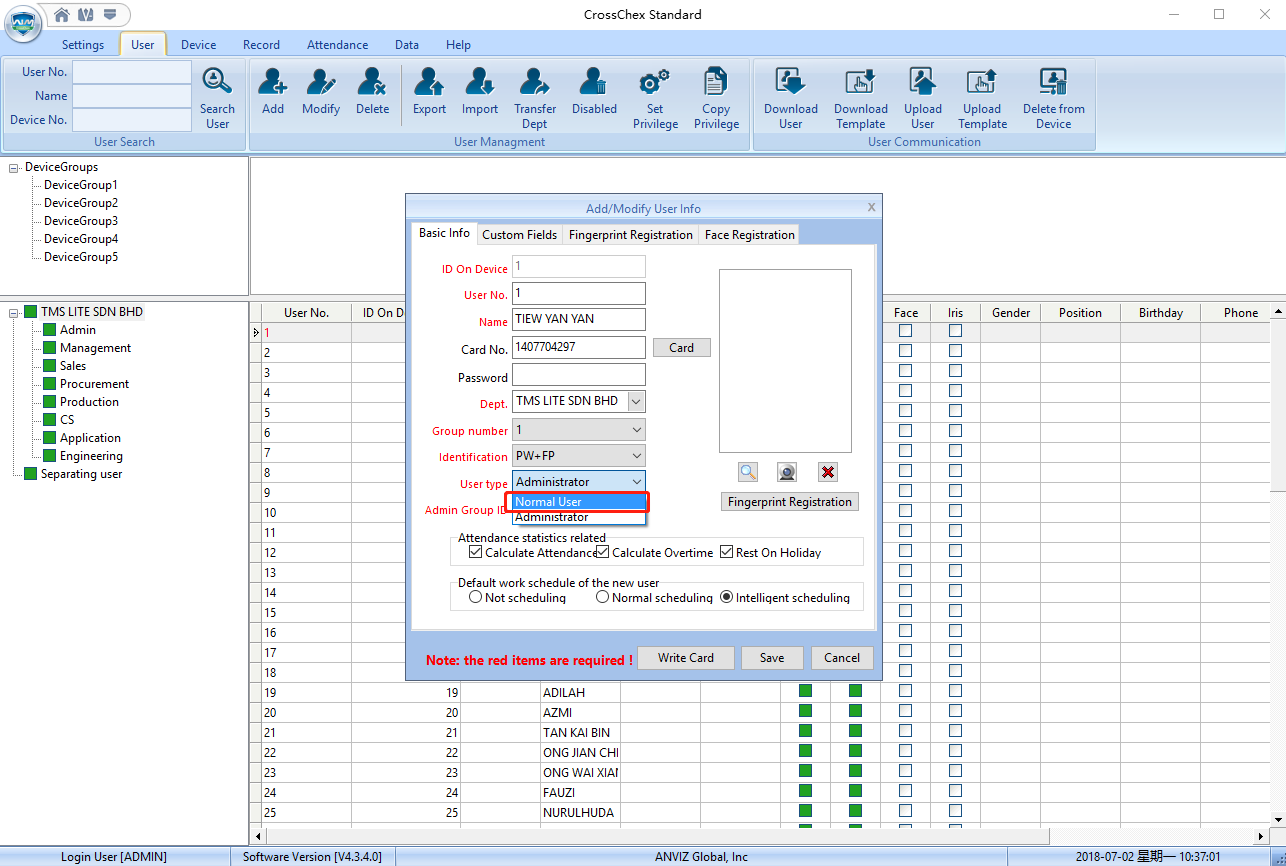
Step 3.1.1
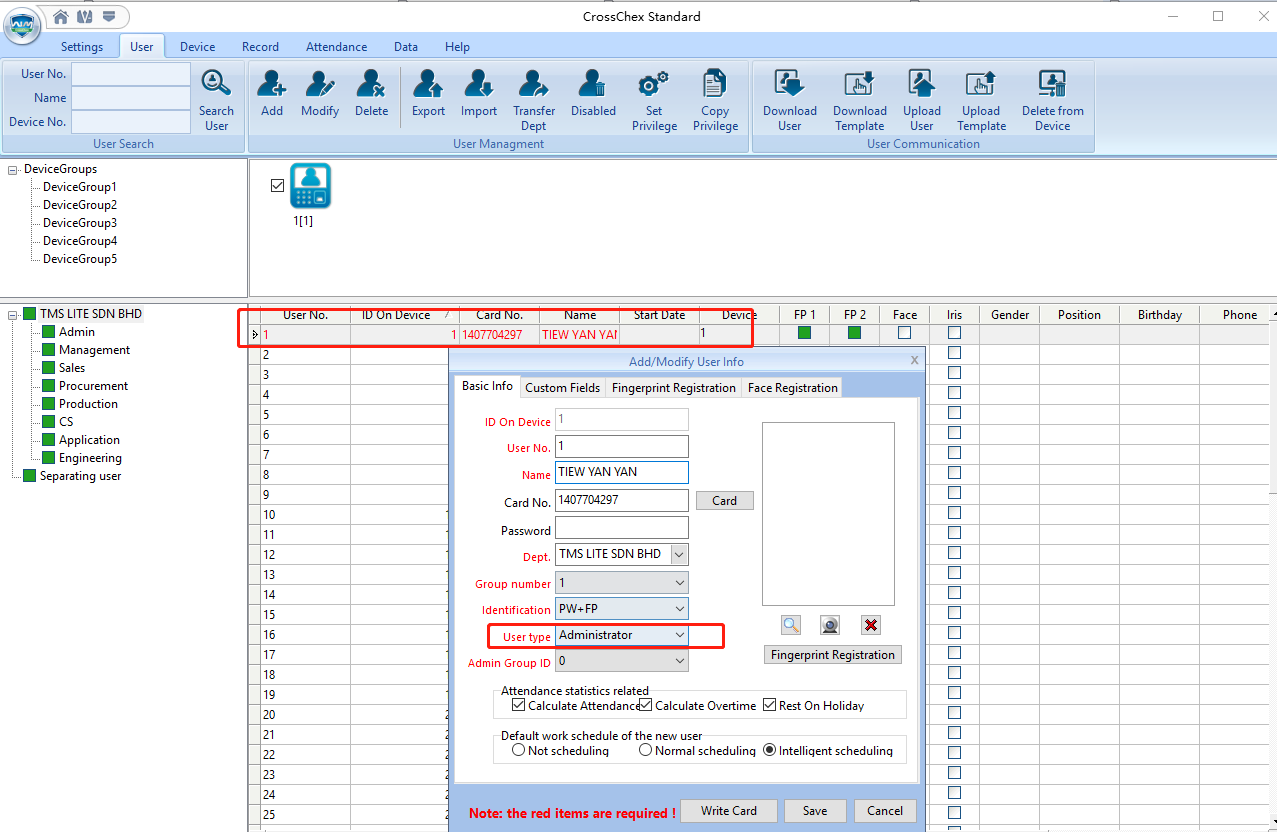
Select user/s that you want to cancel administrator permission, and double click the user, then change 'administrator' (the administrator will display in red font) to 'Normal user'.
CrossChex -> User -> Select one user -> change Administrator -> Normal user
Choose 'Normal user', then click the 'Save' button. It will remove the user's admin permission and set it as a normal user.
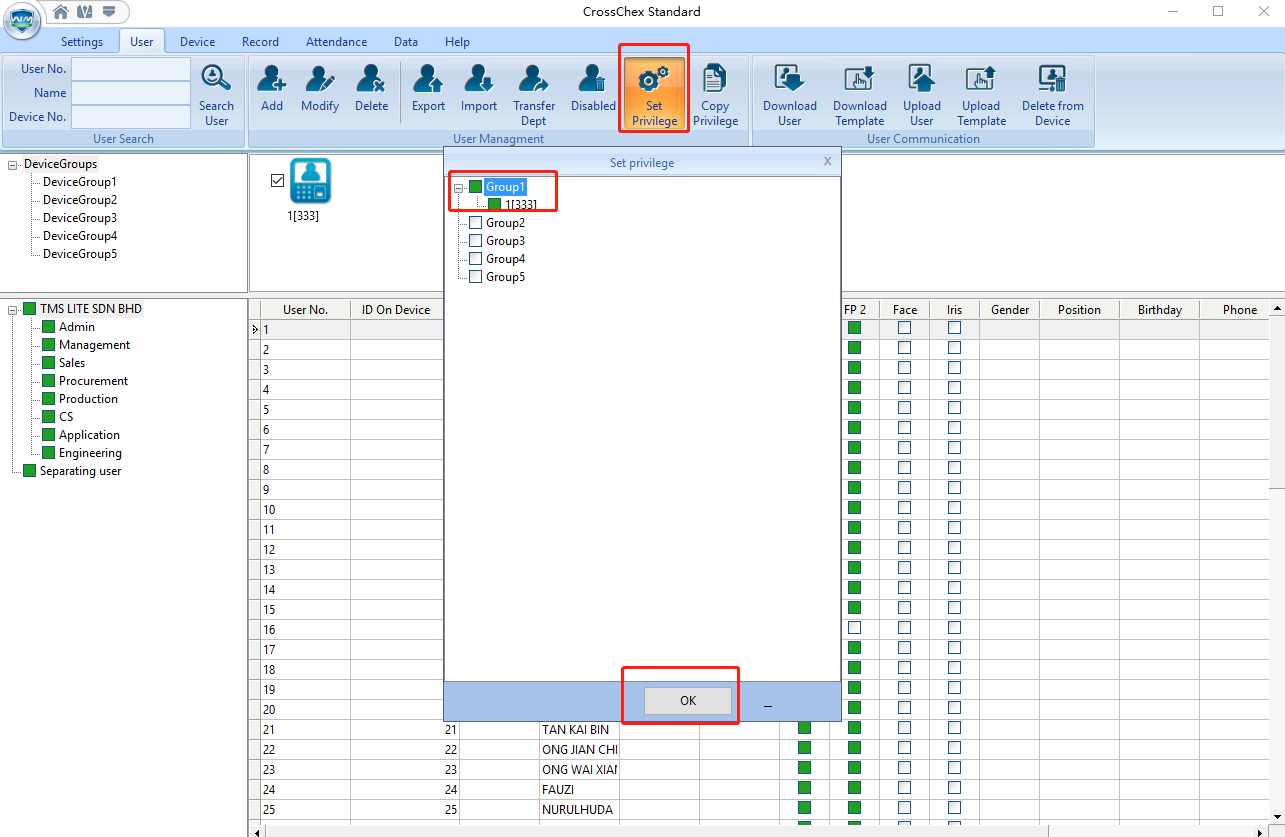
Step 3.1.2
Click 'Set Privilege', and choose the group, then click the 'OK' button.
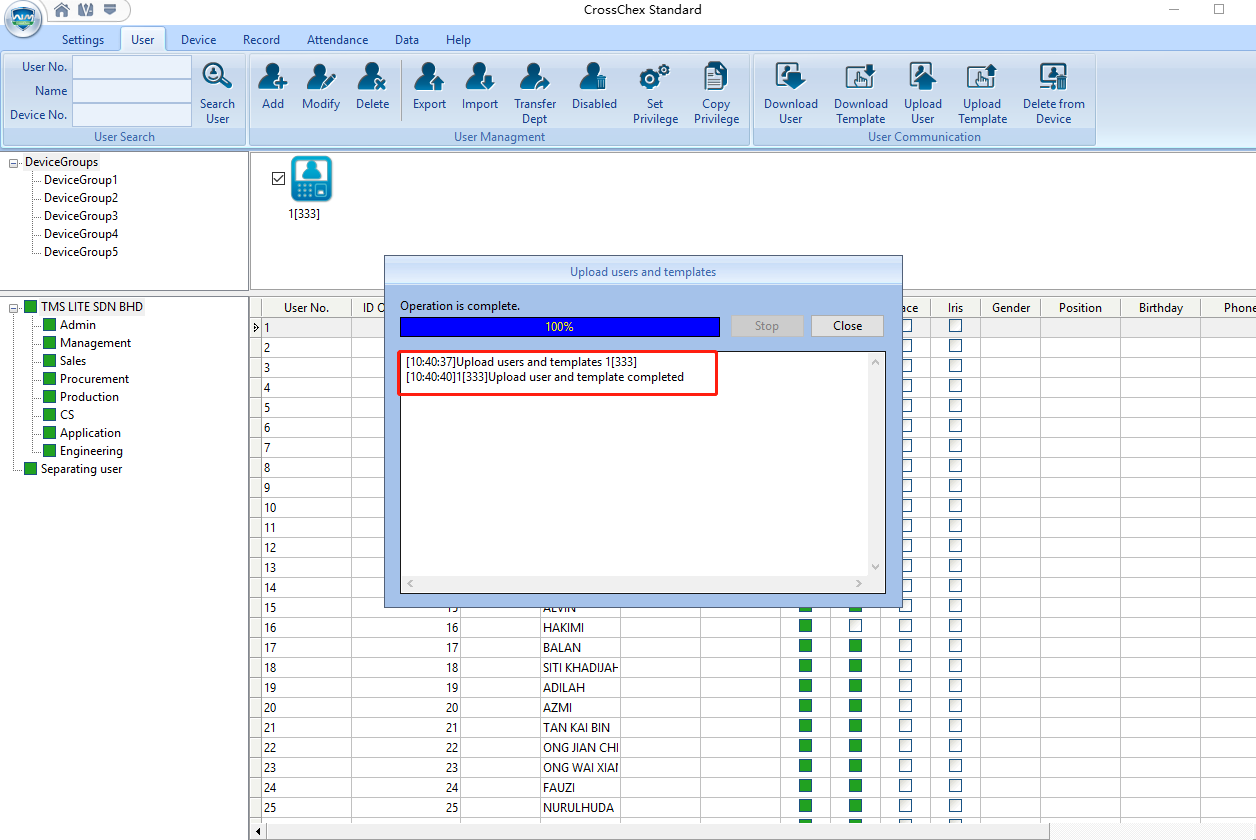
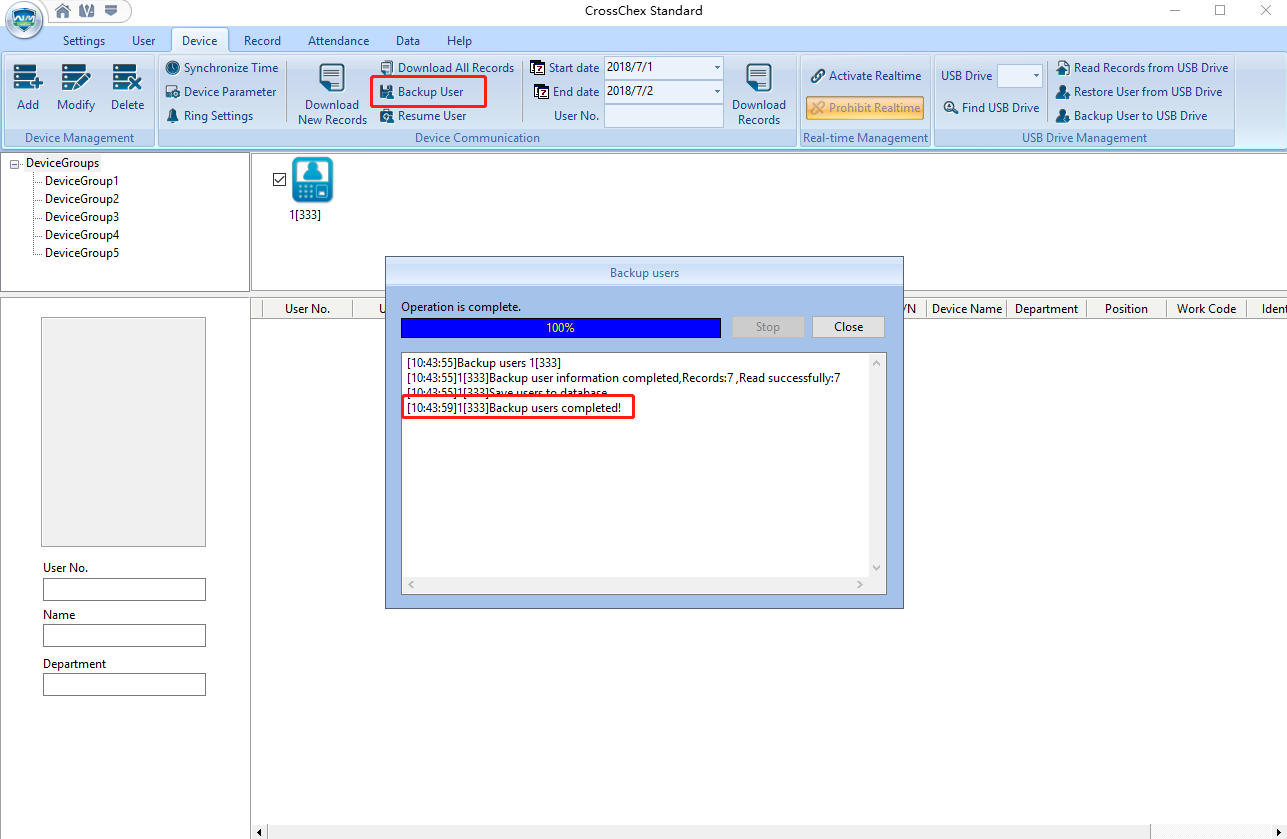
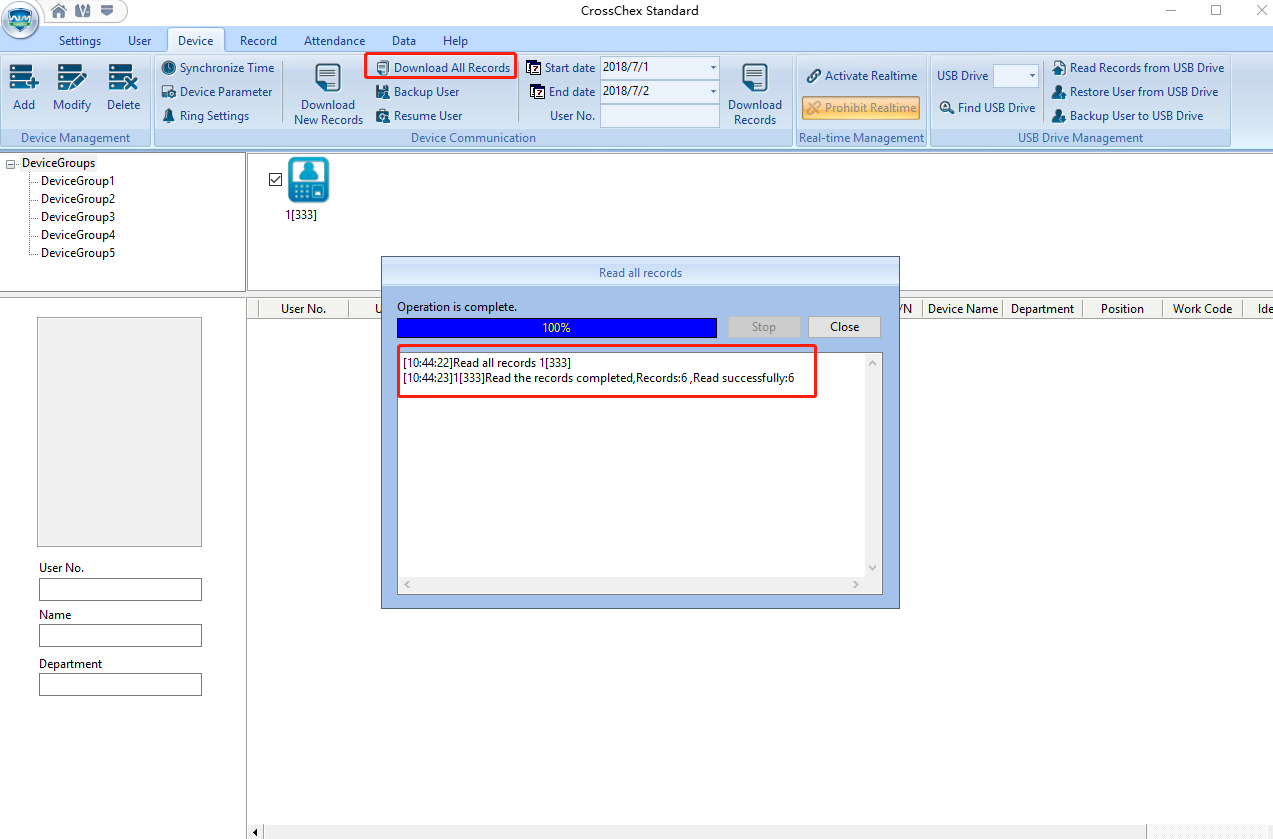
Step 3.2.1: Back up the users and records.
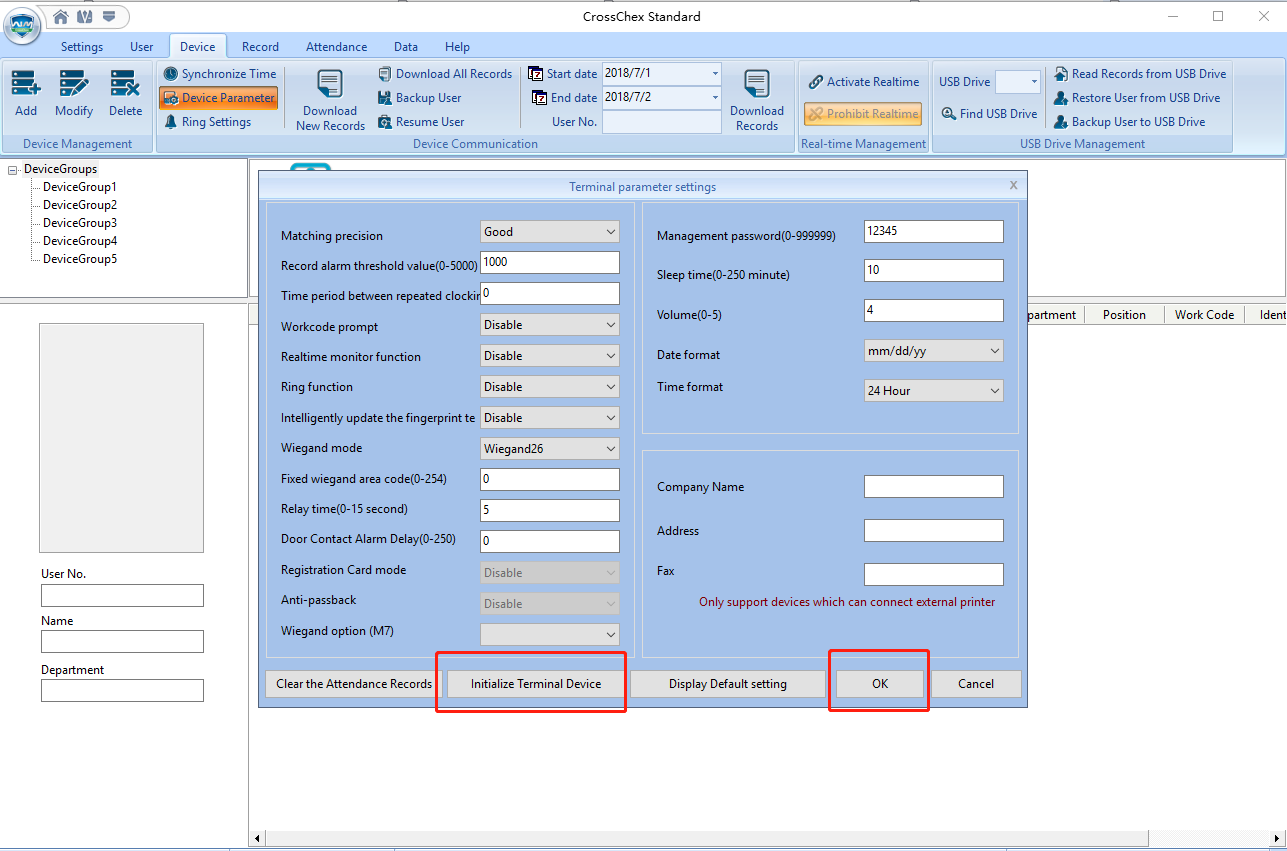
Step 3.2.2: Initialize the Anviz Device (********Warning! All Data Will Be Removed! **********)
Click 'Device Parameter' then 'Initialize the device, and click 'OK'
Part 2: Reset Aniviz devices admin password
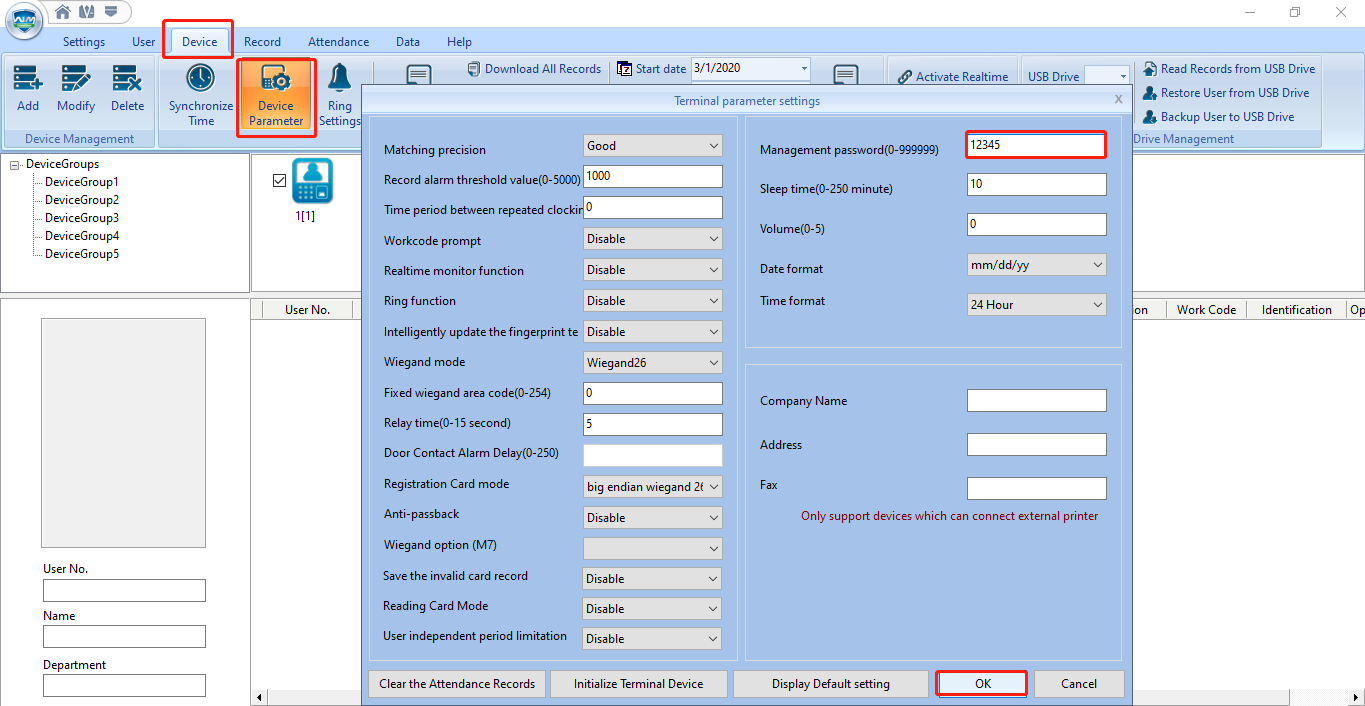
Situation 1: Anviz device is connected to the CrossChex but the admin password is forgotten.
CrossChex -> Device -> Device Parameter -> Management password -> OK
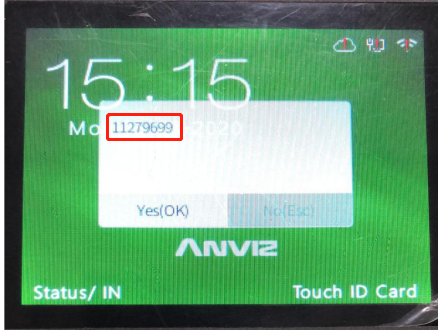
Situation 2: The device's communication & admin password are unknown
Input '000015' and press 'OK'. A few random numbers will pop up on the screen. For security reasons, please send those numbers and the device serial number to the Anviz support team (support@anviz.com). We will provide technical support after receiving the numbers. (Please DO NOT turn off or restart the device before we provide technical support.)
Situation 3: The keypad is locked, communication and admin password are lost
Input 'In' 12345 'Out' and press 'OK'. It will unlock the keypad. Then follow the steps as Situation 2.


.png)